Editing Data
Some layers in the application are editable, which means that users who have the appropriate permissions can create new elements in the layer or they can modify or delete existing elements. If you are working in online mode, these changes are saved in real time in JMap Server. If you are working in offline mode, without an Internet connection, changes are saved in your mobile device and sent to JMap Server when an Internet connection becomes available.
To edit a layer's elements:
1.Touch ![]() to display the Layers menu.
to display the Layers menu.
2.Touch the down arrow ![]() of the Current editable layer field. The list of editable layers is displayed.
of the Current editable layer field. The list of editable layers is displayed.
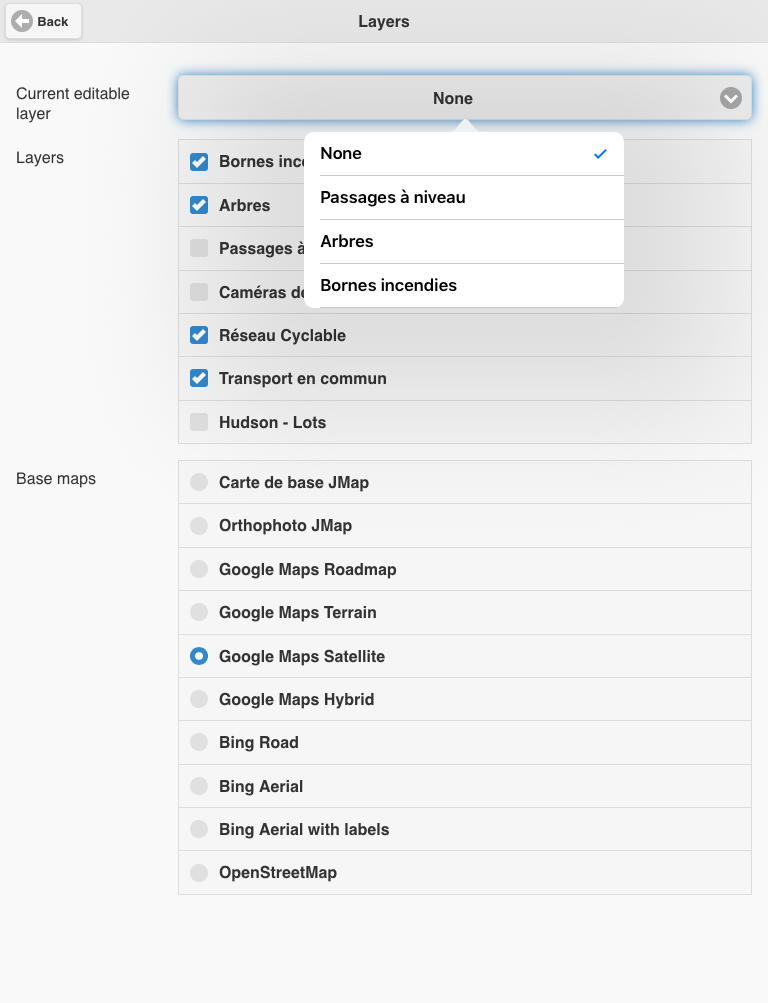
3.Select the layer you wish to edit.
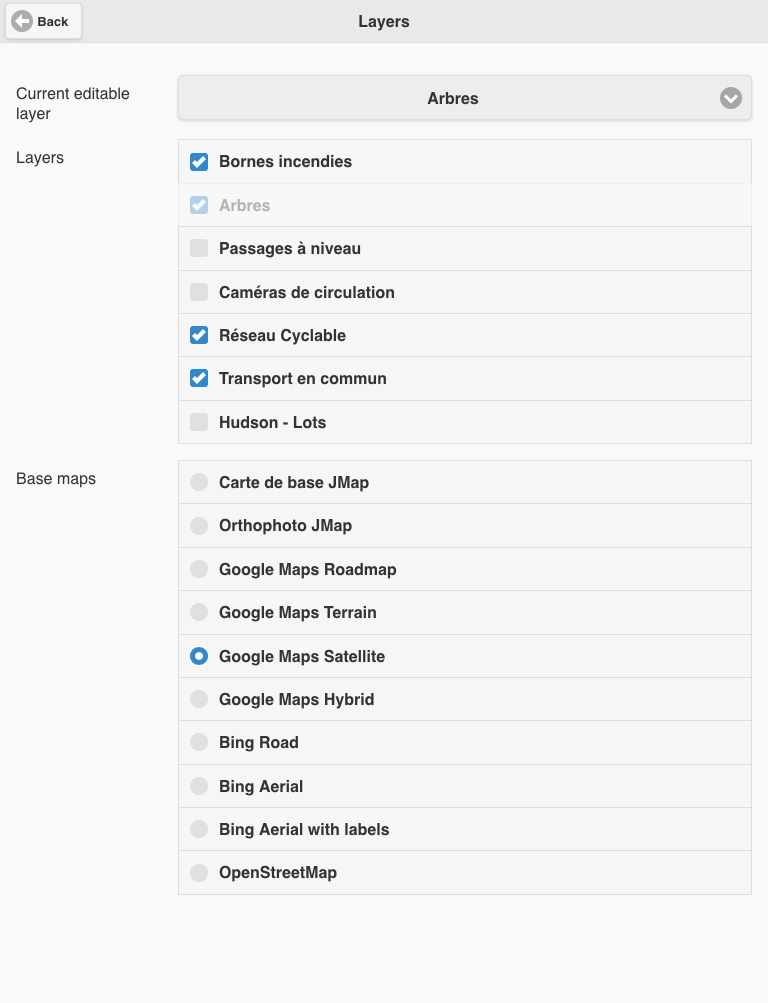
4.Touch Back to return to the map interface. The pencil icon ![]() displays.
displays.
5.Touch the pencil icon ![]() to access the editing tools. The editing menu displays and the icon turns blue
to access the editing tools. The editing menu displays and the icon turns blue ![]() .
.
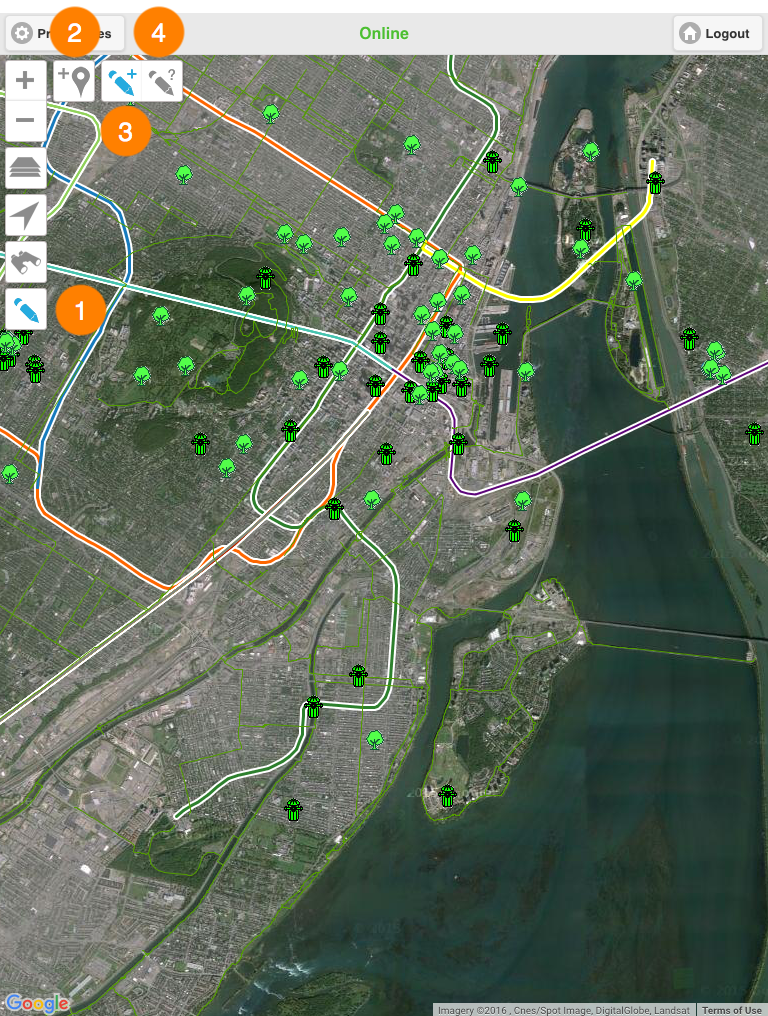
1 |
This icon allows you to enable and disable the data editing function. |
2 |
This tool allows you to create an element with the mobile device's geographic coordinates. |
3 |
This tool allows you to create an element by touching the map interface. |
4 |
This tool allows you to modify attribute values or delete an existing element. |
Creating a new element
There are two ways to create a new element: by locating it directly on the map or by using the mobile device's location function.
Creating an element by locating it on the map
You must enable the ![]() tool by touching it. When enabled, the icon will turn blue
tool by touching it. When enabled, the icon will turn blue ![]() .
.
1.Touch the position where you want the new element to be located. A form displays, allowing you to enter the element's attribute values.
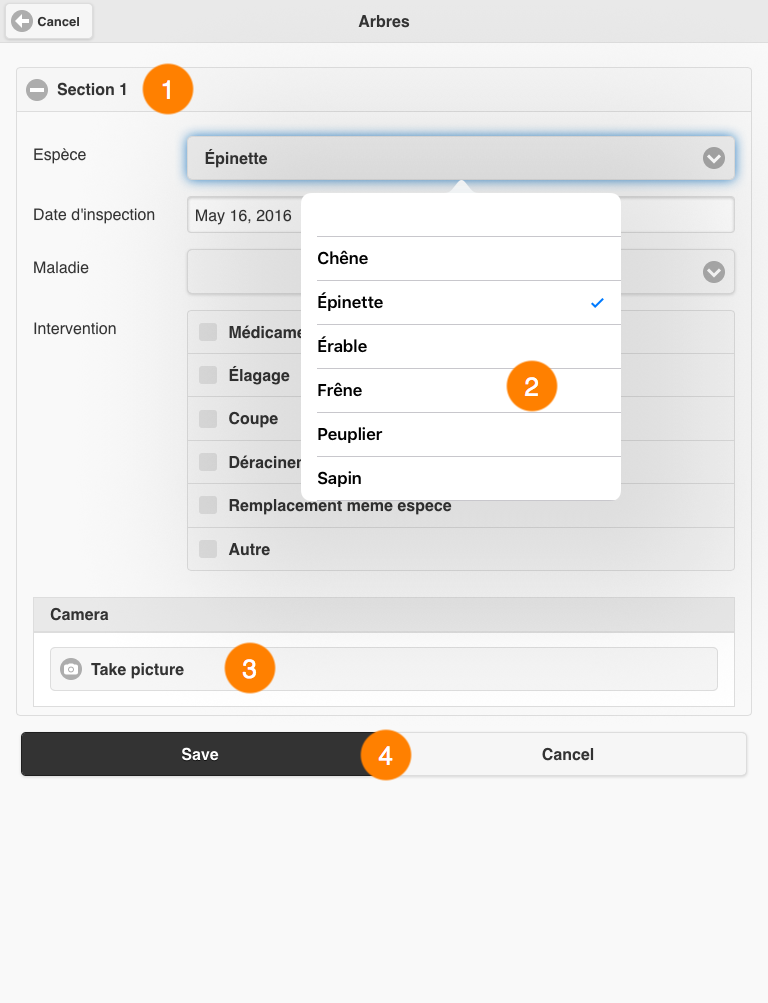
1 |
The form may have several sections to make it more ergonomic. |
2 |
Attribute values can be entered by selecting one or more options in drop-down menus, by entering data in a specific field or by using a calendar. Some attributes may be required; you must specify a value for these or you will not be able to submit the form. |
3 |
You can take one or more pictures with your mobile device's camera. |
4 |
These buttons allow you to send the form to JMap Server or cancel it. |
2.Fill out the form.
3.Touch Save to save the information. You will be brought back to the map interface.
4.Repeat the previous steps to create another element.
5.Touch the ![]() icon to disable the tool. The icon turns back to grey
icon to disable the tool. The icon turns back to grey ![]() .
.
6.Touch the ![]() icon to disable the data editing function. The icon turns back to grey
icon to disable the data editing function. The icon turns back to grey ![]() .
.
Creating an element by locating it with the mobile device
1.Touch the ![]() icon to enable the tool. A form displays, allowing you to enter the element's attribute values.
icon to enable the tool. A form displays, allowing you to enter the element's attribute values.
1 |
The form may have several sections to make it more ergonomic. |
2 |
Attribute values can be entered by selecting one or more options in drop-down menus, by entering data in a specific field or by using a calendar. Some attributes may be required; you must specify a value for these or you will not be able to submit the form. |
3 |
You can take one or more pictures with your mobile device's camera. |
4 |
These buttons allow you to send the form to JMap Server or cancel it. |
2.Fill out the form.
3.Touch Save to save the information. You will be brought back to the map interface.
4.Repeat the previous steps to create another element.
5.Touch the ![]() icon to disable the data editing function. The icon turns back to grey
icon to disable the data editing function. The icon turns back to grey ![]() .
.
Modifying or deleting an element
1.Touch the ![]() icon to enable the tool. The icon turns back to blue
icon to enable the tool. The icon turns back to blue![]() .
.
2.Touch the element you wish to modify or delete. The element's attribute form displays.
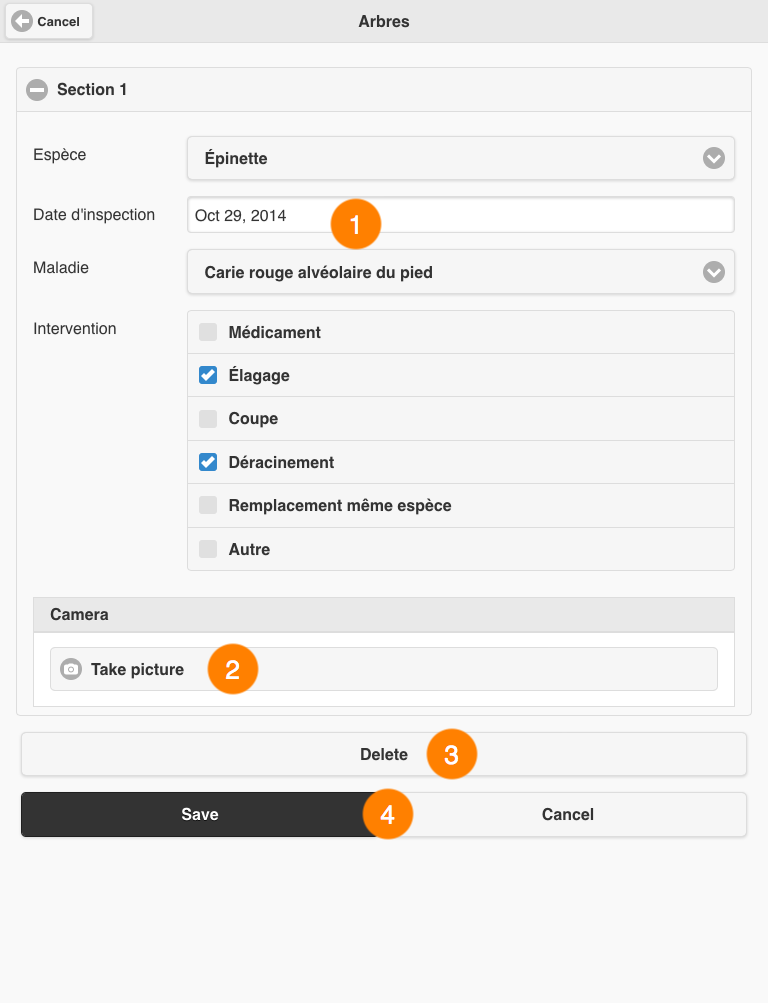
1 |
The form contains values for the attributes you can modify. |
2 |
You can take pictures with your mobile device's camera. |
3 |
You can delete the element. |
4 |
These buttons allow you to send the form to JMap Server or cancel it. |
3.Modify the attribute values.
4.Touch Delete to delete the element.
5.Touch Save to save the information. You are redirected to the map interface.
6.Repeat the previous steps to edit or delete another element.
7.Touch the![]() icon to disable the data editing function. The icon turns back to grey
icon to disable the data editing function. The icon turns back to grey ![]() .
.