Some of the Portal's layers are editable, which means users who have the right permissions can create new point, line or polygon elements on the layer, remove existing elements, and modify the location and attributes of existing elements. Please, contact the Railway Association of Canada for more information on your permissions to edit data.
To edit the elements of a layer:
1.Click on  Sidebar and then click on the Layers tab to display the list of layers for the Portal. The
  icon indicates that the layer is editable.
2.Click on the icon of the layer you wish to edit. The icon turns blue  , indicating that the editing functions are enabled. The editing tools are displayed in the toolbar.
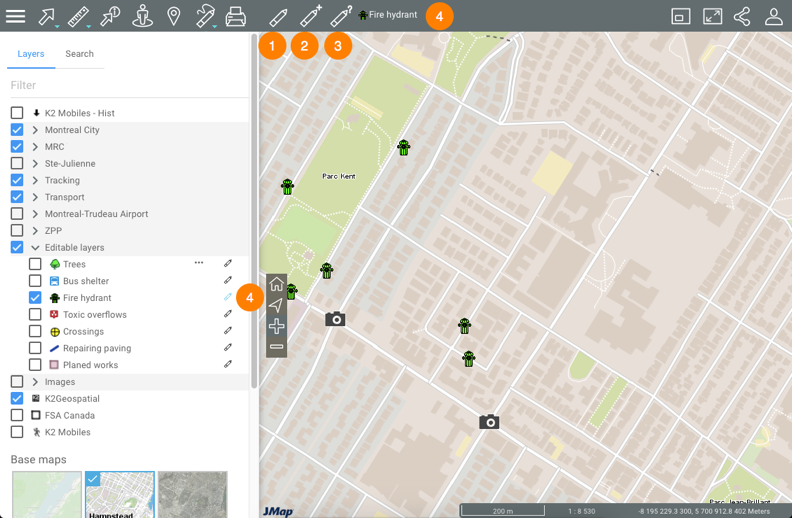
1 |
This tool is used to modify the position of an element in the editable layer. |
2 |
This tool is used to create a new element in the editable layer. |
3 |
This tool is used to open a form, which allows you to modify the value of an element's attributes. |
4 |
The |
3.Click on the icon of the layer to stop editing it. The icon will turn grey , indicating that editing functions are disabled.
Modifying the position of an element
1.Click on  Edit Elements to enable the tool. The icon turns blue
  .
.
2.Click on the element whose position you wish to change. A green and blue mark appears on the element, indicating it has been selected to be edited.
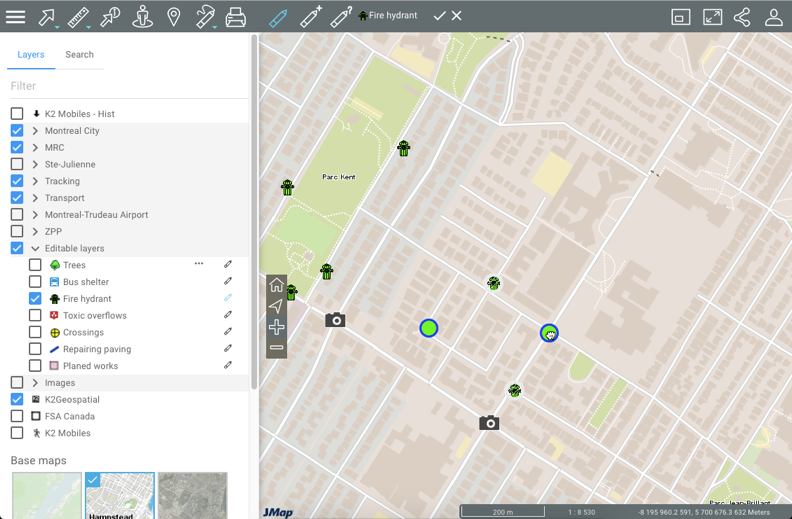
3.Drag and drop the element to the desired position.
4.Repeat steps 2 and 3 to move other elements. The number of edited elements is displayed next to the layer name in the toolbar.
5.Select  to save your changes or
  to discard them. You can also wait until you are finished making all your changes to save or discard all of them at once.
6.Click on to disable the tool. The icon turns grey .
Creating an element
1.Click on  Create Elements to enable the tool. The icon turns blue
  .
.
2.Click on the location where you wish to create the element. A form displays, allowing you to define attribute values.
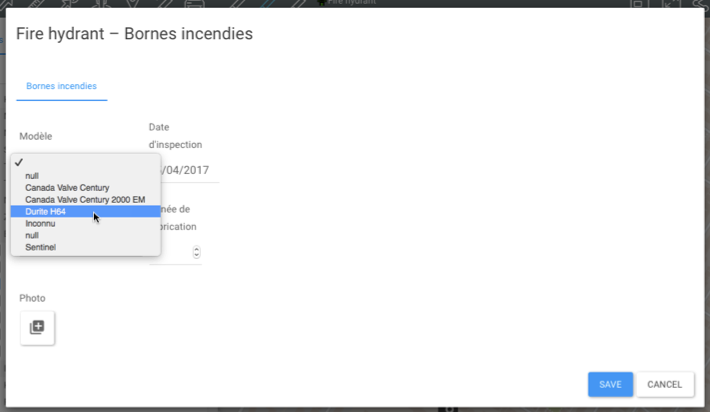
3.Enter the attribute values in the appropriate fields.
4.Click on Save to create the new element. The element displays in the map.
5.Repeat steps 2, 3 and 4 to create other elements. The number of edited elements is displayed next to the layer name in the toolbar.
7.Select to save your changes or to discard them. You can also wait until you are finished making all your changes to save or discard all of them at once.
6.Click on to disable the tool. The icon turns grey .
Modifying the value of an element's attributes
1.Click on  Form to enable the tool. The icon turns blue
  .
.
2.Click on the element whose data you wish to modify. A form displays, allowing you to define attribute values.

3.Configure the attribute values in the appropriate fields.
4.Click on Save to save the changes.
5.Repeat steps 2, 3, and 4 to modify the attribute values of other elements. The number of edited elements is displayed next to the layer name in the toolbar.
6.Select to save your changes or to discard them. You can also wait until you are finished making all your changes to save or discard all of them at once.
7.Click on to disable the tool. The icon turns grey .
Certain forms are complex and comprised of several sections:
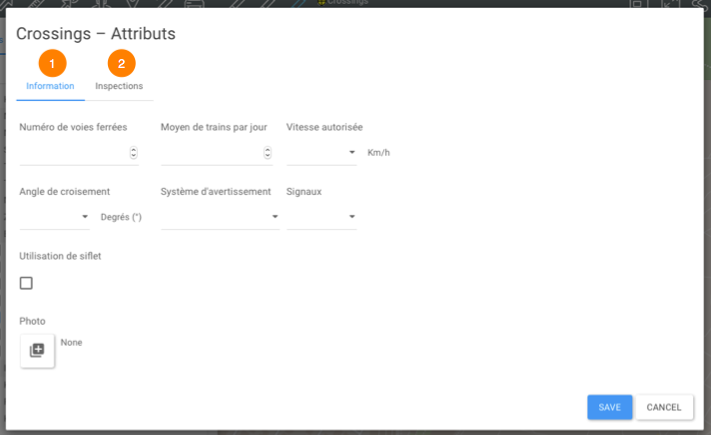
1 |
The main section of the form. This section may contain attributes that you cannot modify. |
2 |
Subform. There may be several subforms within one form. |
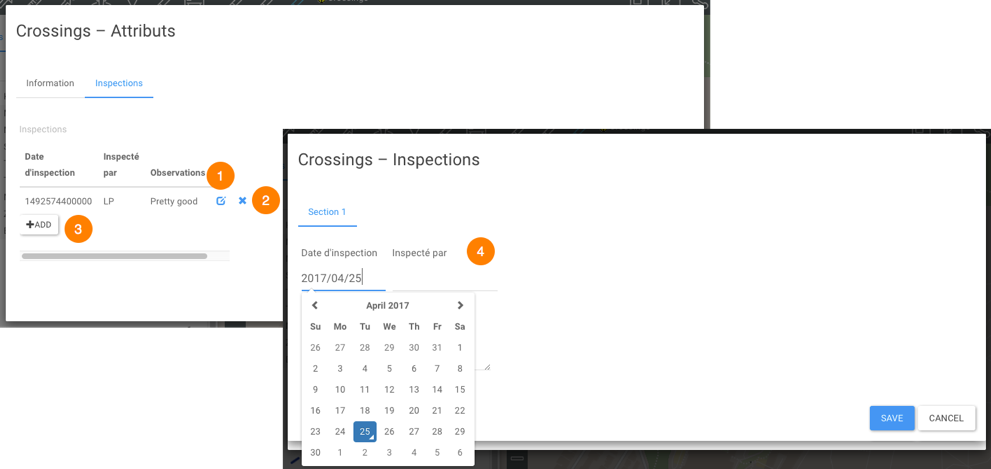
1 |
You can edit a log entry in a subform. |
2 |
You can delete a log entry from a subform. |
3 |
You can add a log entry to a subform. |
4 |
A page of the subform allows you to add or modify the attributes of a subform's log entry. |