Modifying Objects
When you have the required permissions, you can modify the objects of a project’s editable layers. Note: It is possible that you will only be able to change the elements you created.
To modify an object, follow these steps:
-
Touch
 to display the project’s layers.
 -
Select the layer to modify in order to make sure it is visible on the map.
-
Touch the object to modify in order to display its mouseover bubble.
-
Touch
 to open the editing interface.
-
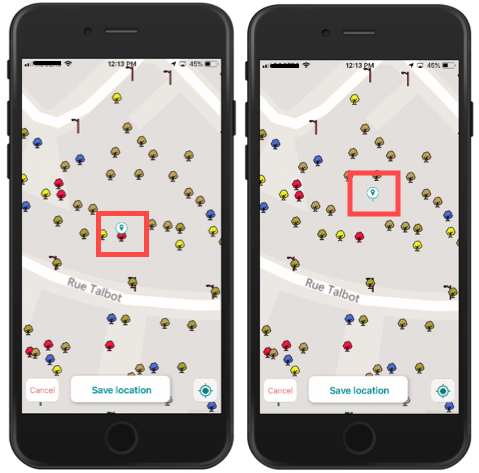
Select Edit Position to modify the geometry and/or position of the object.
-
If you are modifying a point object, touch the map to indicate its new location; a marker will indicate the chosen location. You can also touch
 to bring the object to your current location.
-
Touch Save to save the change or Cancel to disregard it.
-
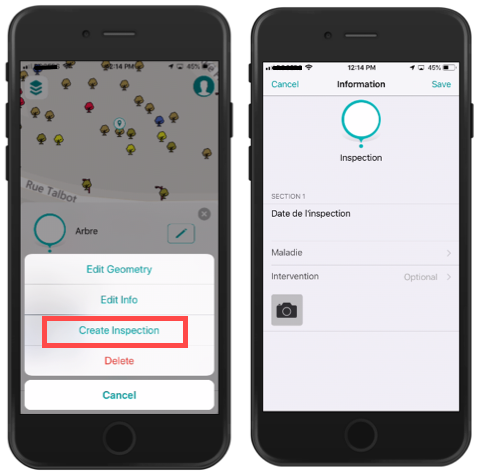
Touch Edit Info to modify the attribute information. The form opens, allowing you to modify the editable fields and subforms. You can use the voice function of your phone to orally indicate the value of the field. The text is transcribed automatically.

-
To edit comments on a photo, tap it to view the photo with its comment.
-
Touch Edit to access the comment editing screen. You can write a comment of a maximum of 255 characters. You can use the voice function of your phone to indicate the comment orally. The text is transcribed automatically.
-
Touch Save to save the change, Cancel to disregard it or
 to delete the photo.
-
Shortcuts to the subforms will then be displayed in the editing interface. These shortcuts will allow you to directly access the subforms and fill them out. In the example below, an Inspection subform exists, and its shortcut is called Create Inspection. Touch Create Inspection to create a subform associated with the object’s attributes form.

-
Touch Save to save the changes made in the form and subforms.
-
Touch Delete to eliminate the object. If you have the required permission, the object will be eliminated.