JMap Documents Pro
Table of contents
- The graphical interface
- Associating documents with map elements
- Searching for documents
- Displaying the list of documents associated with elements
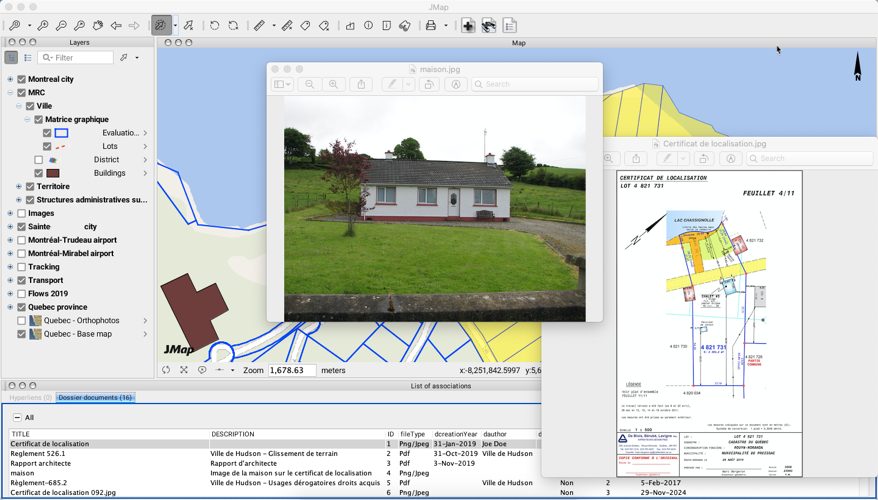
JMap Documents Pro allows JMap Pro users to access and work with documents via the map interface. These documents can be stored in various devices.
JMap Documents Pro offers features to:
-
Associate documents with map elements. These documents can come from various types of depots: a file system, hyperlinks, or the SharePoint electronic document management system (Microsoft).
-
Associate documents with map layer elements by first adding them to a depot.
-
List documents that are associated with selected elements on the map, displaying their metadata.
-
Access documents by opening them in their designated applications and downloading them.
-
Search for documents in the depots using keywords.
The graphical interface
The graphical interface of the Documents extension consists of a set of buttons located in the application toolbar. Users can access the buttons they have been given permission to use. 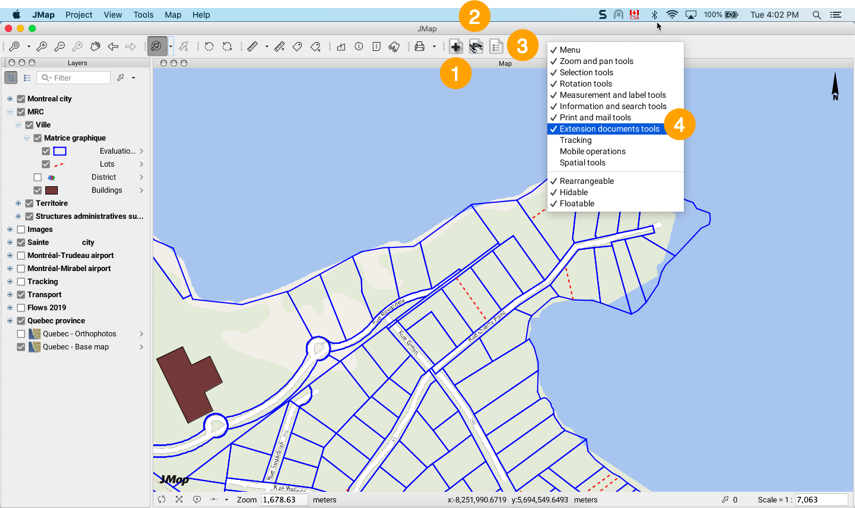
| 1 | This button allows you to add documents and associate documents with a selection of map elements. |
| 2 | This button allows you to search for documents using keywords. |
| 3 | This button allows you to display the list of documents associated with a selection of map elements. |
| 4 | The JMap Documents toolbar can be displayed or hidden using the pop-up menu of the JMap Pro toolbar. |
Associating documents with map elements
This feature allows you to create associations between map layer elements and documents contained in a depot. You can also use it to add a document to an existing depot and associate it with map elements afterwards. You must have the required permissions to use this feature.
Adding a document to a depot
To add a document, which can later be associated with map elements, follow these steps:
-
Select one or more map elements in one or more layers.
-
Click on
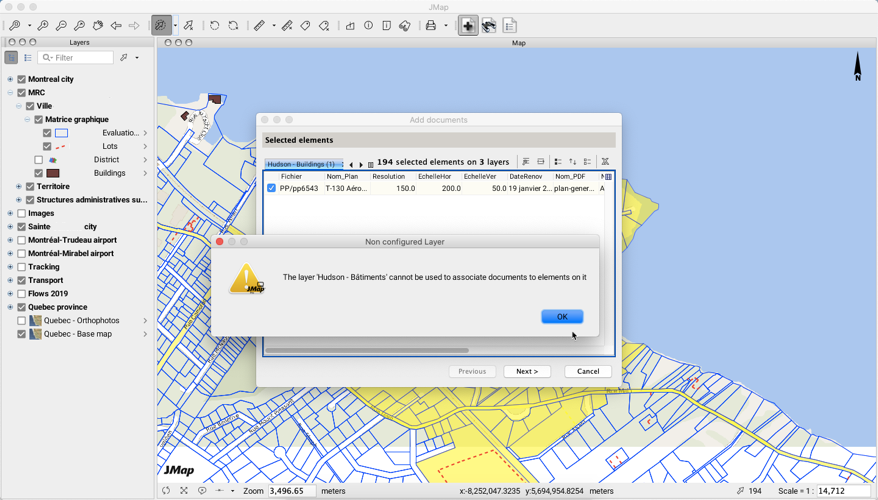
 Add Associations to open the Add documents window.
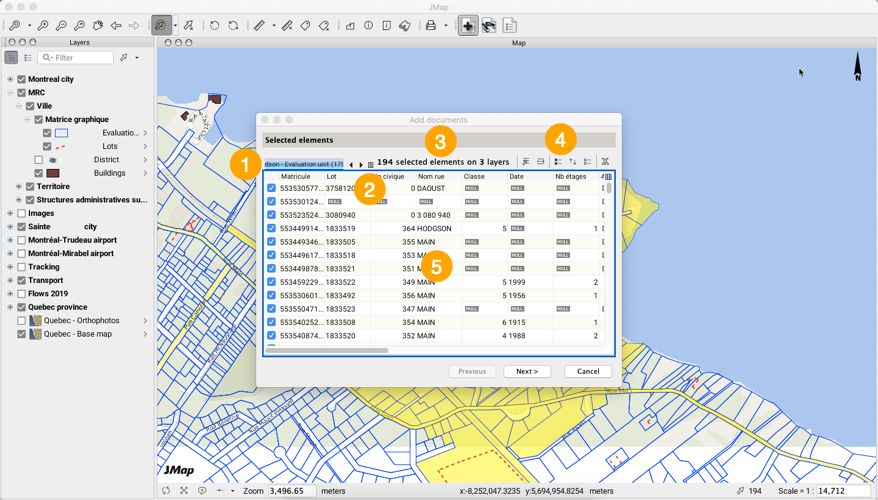
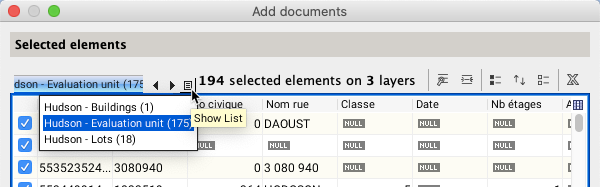
1 Each tab corresponds to a layer that contains the map elements included in the selection. 2 This button allows you to access the layers directly.
3 Information on the number of map elements selected and the number of layers they belong to. 4 These tools allow you to sort map elements, centre a specific element in the map, invert the selection, unselect elements, and export selected elements to an Excel spreadsheet. These tools are similar to those of the elements explorer in JMap Pro. 5 Attributes of the selected elements. If one of the layers whose elements you selected is not configured in order for elements to be associated with it, an error message displays, and you must unselect the layer elements in order to continue.
-
Click on Next to select a depot in which you will store the document to be added or to choose the document to associate with map elements. Each depot can have a description.
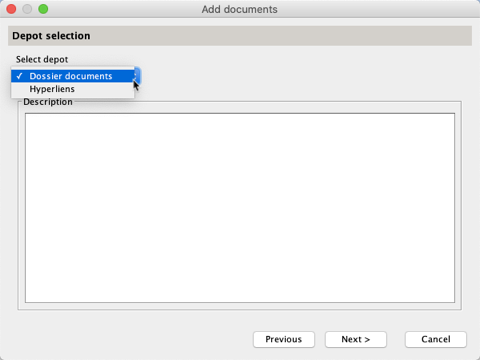
JMap Pro Documents supports connections to file depots (including SharePoint) and hyperlinks. The steps that follow will depend on the type of depot you select.
File depot
-
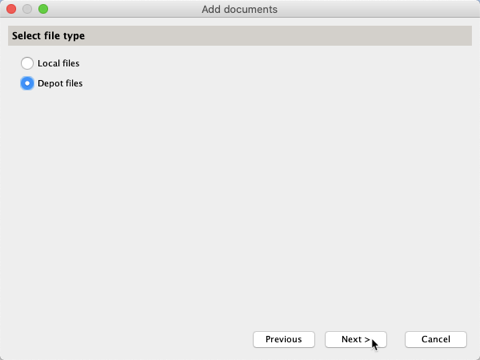
If you are adding documents to a file depot, click on Next to select the appropriate file type.
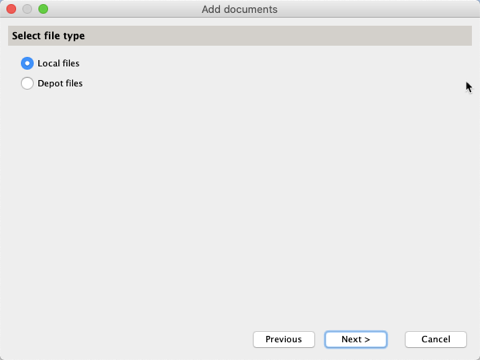
You cannot associate map elements with local files directly. You must first add the local files to a depot, then associate them with the map elements.
-
Select Local files to add a new document to the depot from your computer.
-
Click on Next to select the local file.
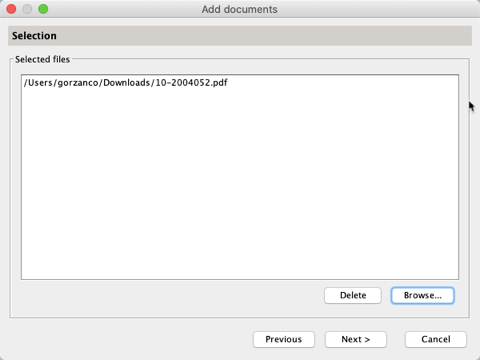
-
Click on Next to access information on the completeness of the metadata.
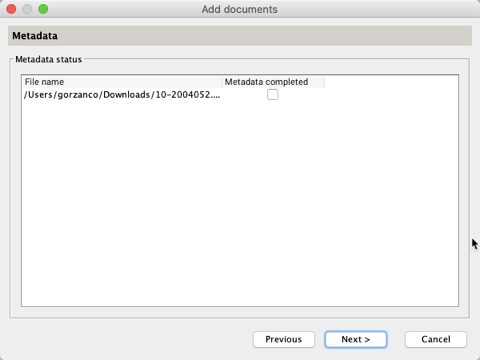
-
Double-click on the name of the file. This will open the interface to enter the metadata. The metadata is configured by the JMap administrator for each document depot.

1 You can change the file name. The file name is a default metadata element of document depots in JMap Documents. 2 You can add a description to the file. The description is a default metadata element of document depots in JMap Documents. 3 This metadata is specific to the selected depot. -
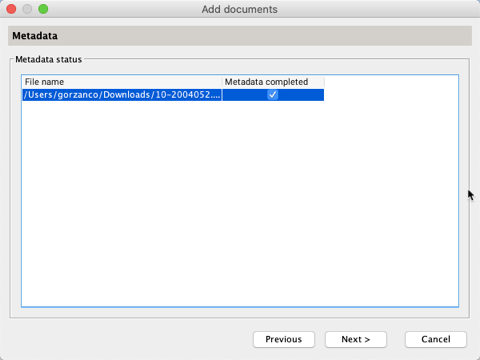
Click on OK to return to the file’s metadata interface. The Metadata completed check box is selected, and you can proceed to the next step.
-
Select the destination of the document in the depot. Depending on the depot’s configuration, you can browse through the directory of the depot and create a new folder to host the local file.
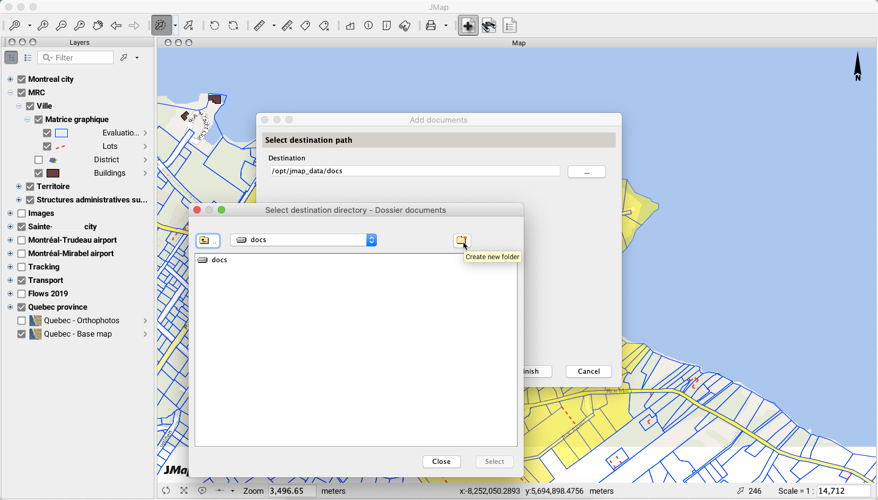
-
Click on Finish to copy the local document in the selected depot. The Add documents window closes.
Hyperlink depot
To associate map elements with documents hosted in a website, follow these steps:
-
Click on Next to add the URL containing the document(s). The URL must be in the following format: http://…
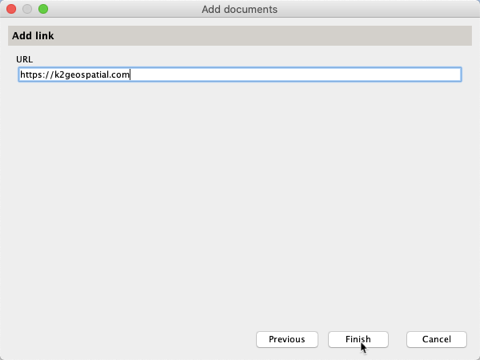
-
Click on Finish to add the document.
The website referenced by the URL is associated with the selected elements.
Associating a document with map elements
A document that is added to a file depot will not be automatically associated with the selected map elements. To associate it, you must go through the Add documents wizard once again while keeping the map elements selected.
-
Click on
Add Associations to open the Add documents window. -
Select Depot files to associate a document with your selection.
-
Click on Next to choose the document(s) you wish associate with your selected elements.
-
Click on
 Depot explorer to select the files by browsing through the depot’s directories.
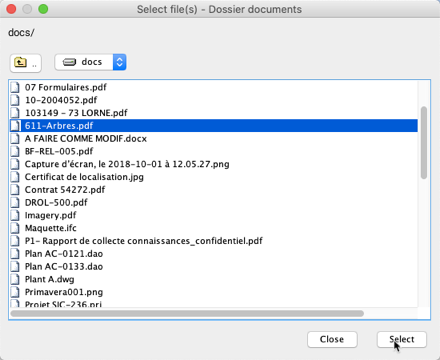
-
Click on
 Search documents to perform a search using keywords.
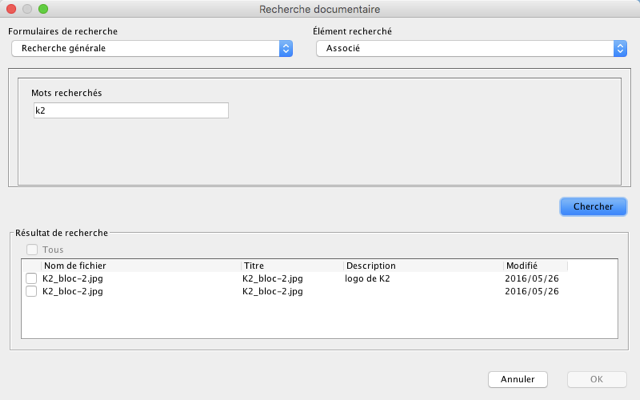
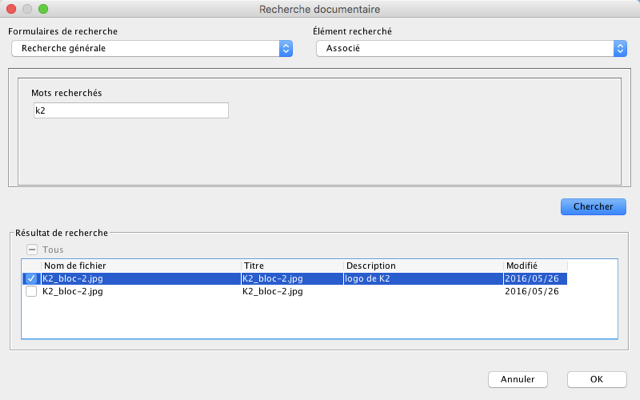
The Search documents interface allows you to select a form among those that have been configured for the depot. You can also determine if the document you are looking for is associated with map elements. Lastly, you can enter keywords for your search.
The search results are listed in a table that provides a few details on each document retrieved.
-
Check the boxes of the documents you are interested in to select them.
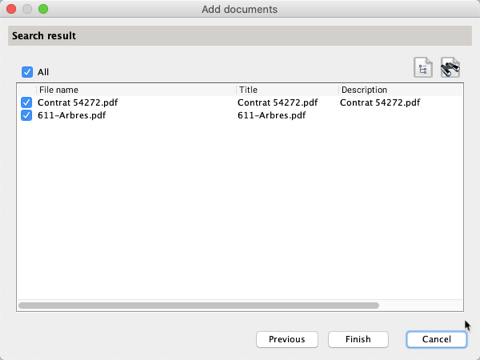
-
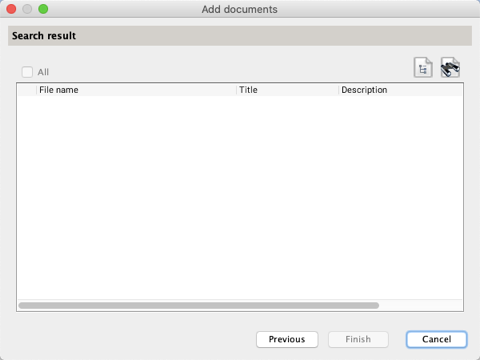
Click on OK to return to the Search result window. The documents selected using both methods are listed in a table. You can select and unselect documents as needed.
-
Click on Finish to associate the selected documents with the selected map elements. The interface automatically closes. A table similar to the elements explorer is displayed. The Searching for documents section provides details on the table’s components.
Searching for documents
If you have the appropriate permissions, you can search for documents in the different depots using forms and keywords. You do not need to select layer elements to do so.
-
Click on
 Search documents in the toolbar of the extension. The Search documents window opens. It allows you to configure the terms of your search.
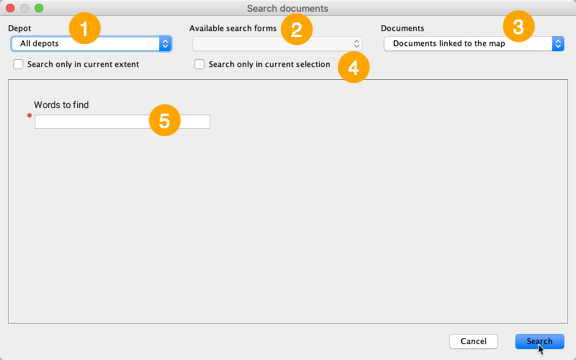
1 You can select the depot(s) in which you want to conduct your search. 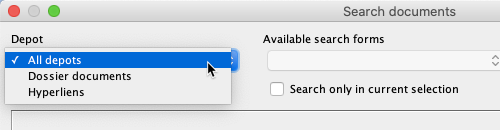
2 When you select a depot, you will be led to one or more forms configured by the administrator. Each depot contains specific metadata. The forms offer a simple way to search for documents within the depot. 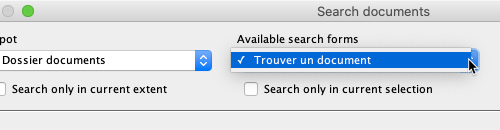
3 You must indicate if the documents you are looking for are linked to map elements. 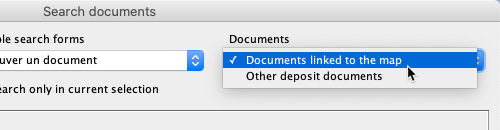
4 You must indicate if your search includes the documents linked to the map elements that are displayed or selected (if you have selected elements). 5 This section contains the default search form (keywords), or other attributes might be available for the search, depending on the depot selected. 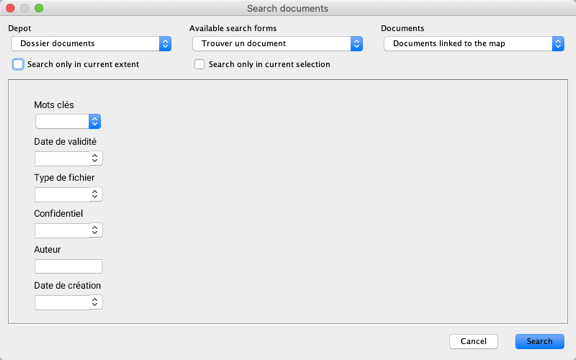
-
Enter the parameters of your search.
-
Click on Search to launch your search. The Search result window opens.
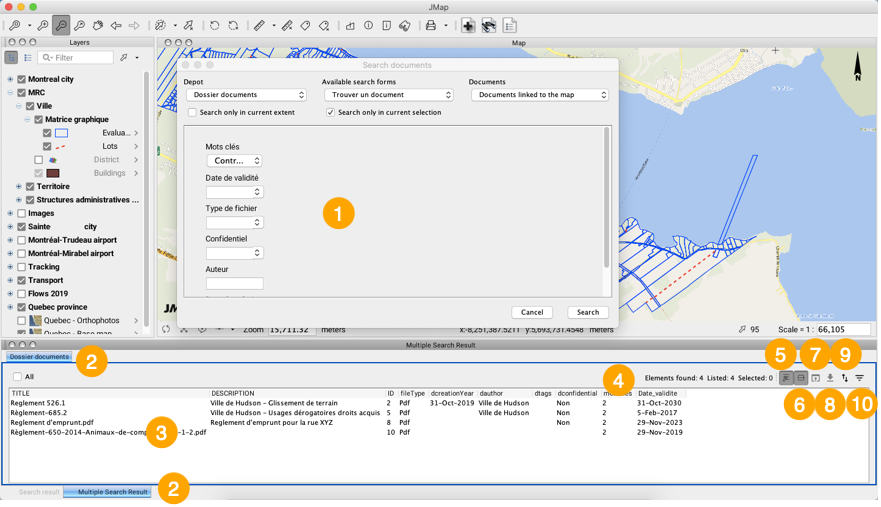
1 The parameters of the search. 2 The name of the document depot. More than one depot can be open, based on the documents identified by the search. More than a research can be open. 3 The fields in the table correspond to the metadata of the documents listed in the rows. The metadata is configured by the JMap administrator for each document depot. 4 Information on the number of documents found, listed, and selected, is displayed in the header of the table. 5 This button allows you to zoom to elements of selected rows. 6 This button allows you to highlight elements of selected rows. 7 This button opens the document in the application defined by default. You can also open the document by double-clicking on its row. The document is saved in a temporary directory. You can only open one document at once using this method. 8 This button allows you to download the document. You can select and download several documents at once; the set of documents will be saved in .zip format in the directory of your choice. 9 This button allows you to export the list of documents to an Excel spreadsheet. 10 This button allows you to filter the documents based on the values of each metadata element. -
Click on a document in the table to select it. Specific functions will be enabled.

1 Clicking on the row of a document will select it. 2 This pop-up menu will open when you right-click on the document. It offers features to work with the document. -
Click on Document information in the pop-up menu to access the document’s metadata. The Document information window opens. It contains two tabs: Document info and Associations.

1 Document info tab. 2 The file depot that allows you to delete the document in the depot or replace it with another document.
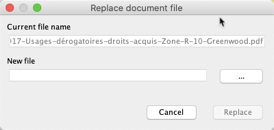
3 The file name of the document. 4 A description of the document may be provided. You can modify it if you have the appropriate permissions. 5 The document’s metadata. You can modify it if you have the appropriate permissions. 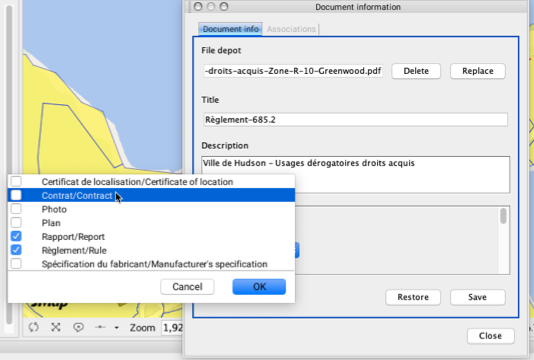
The Associations tab displays the map elements associated with the document. It also allows you to delete and add associations, if you have the appropriate permissions to do so.
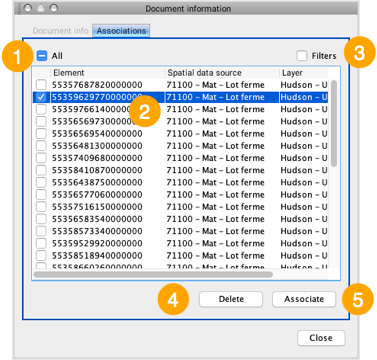
1 Check the boxes to select all the elements associated with the document, or uncheck them to unselect them. 2 Filter for the map elements associated with the document. 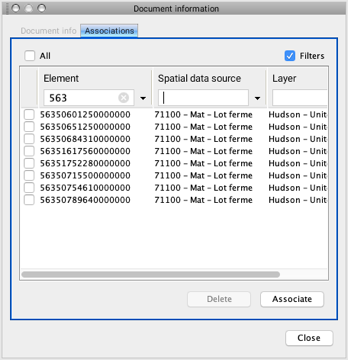
3 Each element is identified by its unique identifier, its spatial data source, and the layer it belongs to.
Double-click on the element to centre it in the map and make it blink.
To be deleted from the association, the map element must be selected by checking the box.4 You can delete the document’s association with the selected map element(s). 5 You can associate the document with other map elements. -
Click on Associate to associate new map elements with the document. The Associations update window displays. This window is similar to the elements explorer in JMap Pro.

1 Each tab corresponds to a layer containing selected map elements. 2 Information on the number of map elements selected and the number of layers they belong to. 3 These tools allow you to sort map elements, centre a specific element in the map, and export elements to an Excel spreadsheet. These tools are similar to those of JMap Pro’s elements explorer. 4 Available features: add associations containing the selected elements to the existing associations, or replace existing associations with the associations containing the selected elements. -
Right-click on a document to open the pop-up menu.
-
Click on Show on the map to centre the elements associated with the selected document in the map. The elements blink for easy viewing.
-
Right-click on a document to open the pop-up menu.
-
Click on Copy Value. The value of the metadata you clicked on (in the column where you clicked) is copied to the clipboard and can be pasted to documents of various formats.
Displaying the list of documents associated with elements
If you have the required permissions, this feature allows you to display the list of documents associated with one or more selected map elements. You can also access these elements as well as modify their metadata and associations with map elements.
-
Select one or more map elements in one or more layers.
-
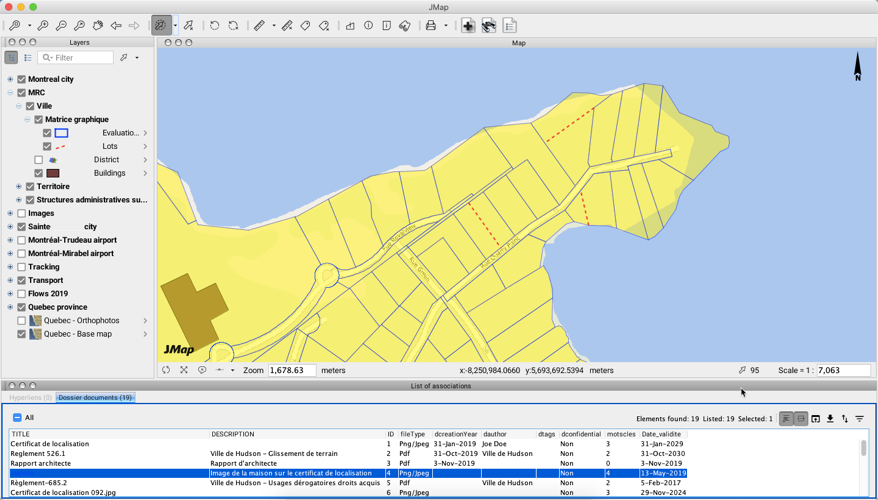
Click on the
 List Associations by selection button. A window titled List of associations is displayed. This window is dynamic and its content is automatically refreshed when you select and unselect map elements. When no elements are selected, the window is empty.
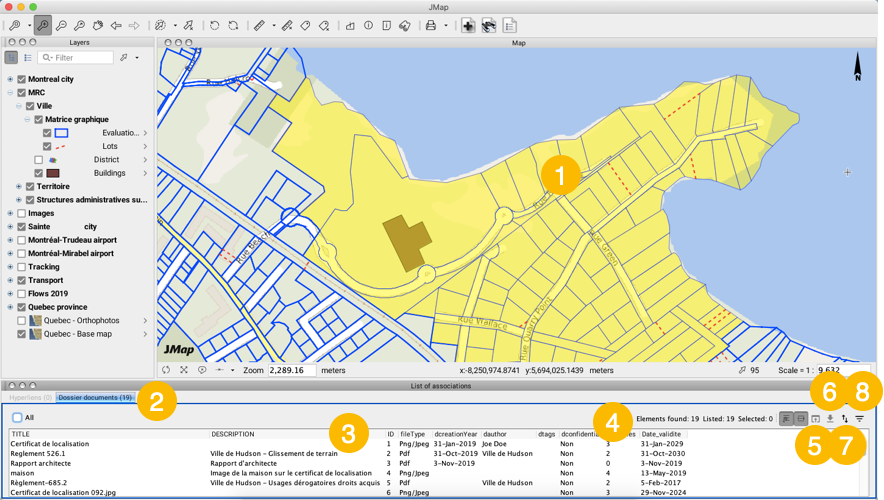
1 The selected map elements. You can use interactive selection tools, attribute selection queries or spatial queries to make your selection. The selected map elements can belong to different layers. 2 The name of the document depot. More than one depot can be open, based on the selected elements. 3 The fields in the table correspond to the metadata of the documents listed in the rows. The metadata is configured by the JMap administrator for each document depot. 4 Information on the number of documents found, listed, and selected, is displayed in the header of the List of associations. 5 This button opens the document in the application defined by default. You can also open the document by double-clicking on its row. The document is saved in a temporary directory. You can only open one document at once using this method. 6 This button allows you to download the document. You can select and download several documents at once; the set of documents will be saved in .zip format in the directory of your choice. 7 This button allows you to export the List of associations to an Excel spreadsheet. 8 This button allows you to filter the documents based on the values of each metadata element. 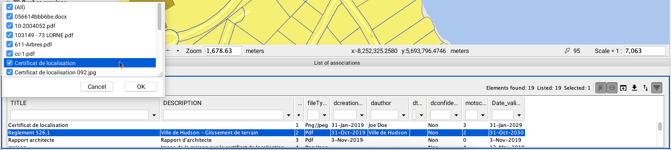
-
Click on a document in the table to select it. Specific functions will be enabled.

1 Clicking on the row of a document will select it. 2 This pop-up menu will open when you right-click on the document. It offers features to work with the document. -
Click on Document information in the pop-up menu to access the document’s metadata. The Document information window opens. It contains two tabs: Document info and Associations.
1 The Document info tab. 2 The file depot that allows you delete the document in the depot or replace it with another document. 3 The file name of the document. 4 A description of the document may be provided to complete the information. You can modify it if you have the appropriate permissions. 5 The document’s metadata. You can modify the metadata if you have the appropriate permissions. The Associations tab displays the map elements associated with the document. It also allows you to delete and add associations, if you have the appropriate permissions.
1 Check the boxes to select all the elements associated with the document, or uncheck them to unselect them. 2 Filter for the map elements associated with the document. 3 Each element is identified by its unique identifier, its spatial data source, and the layer it belongs to.
Double-click on the element to centre it in the map and make it blink.
To be deleted from the association, the map element must be selected by checking the box.4 You can delete the document’s association with the selected map element(s). 5 You can associate the document with other map elements. -
Click on Associate to associate new map elements with the document. The Associations update window displays. This window is similar to the elements explorer in JMap Pro.
1 Each tab corresponds to a layer containing selected map elements. 2 Information on the number of selected map elements and the number of layers they belong to. 3 These tools allow you to sort map elements, centre a specific element in the map, and export the elements to an Excel file. These tools are similar to those of JMap Pro’s elements explorer. 4 Available features: add associations containing the selected elements to the existing associations, or replace existing associations with the associations containing the selected elements. -
Right-click on a document to open the pop-up menu.
- Click on Show on the map to centre the elements associated with the selected document in the map. The elements blink for easy viewing.
- Right-click on a document to open the pop-up menu.
- Click on Copy Value. The value of the metadata you clicked on (in the column where you clicked) is copied to the clipboard and can be pasted to documents of various formats.