Before using Tracking, it is essential to create a spatial data source for this extension. Tracking uses data source types that have been developed specifically for it. The ones provided with Tracking read the data in the Tracking database, but additional Tracking data sources can be developed to obtain data differently, for example, by querying a Web service via the Internet.
Once you have prepared the Tracking data source as well as layers for Tracking in one or more projects, you will be ready to begin configuring the Tracking extension.
Creating a spatial data source for Tracking
Follow the steps below to create a spatial data source for Tracking.
1.Create a spatial data source. The name you give the data source is not important.
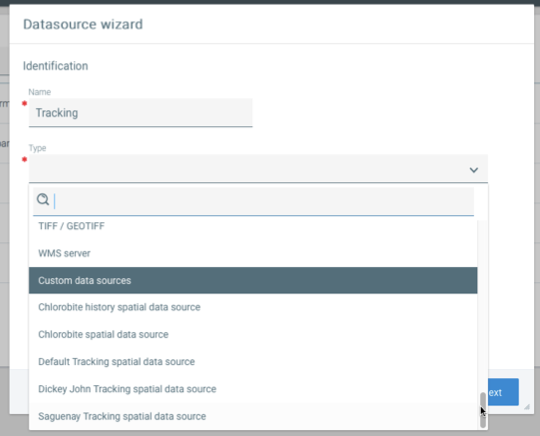
2.At the following step, select the Default Tracking spatial data source type. Other types of data sources can exist for Tracking, such as one for Dickey-John equipment to manage application data for winter maintenance. Their configuration is similar.
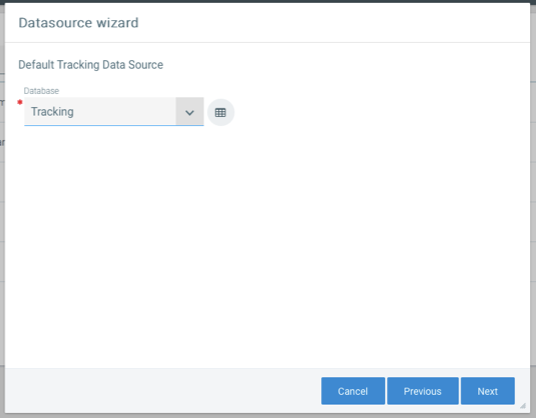
3.On the next step, select the Tracking database in the list.
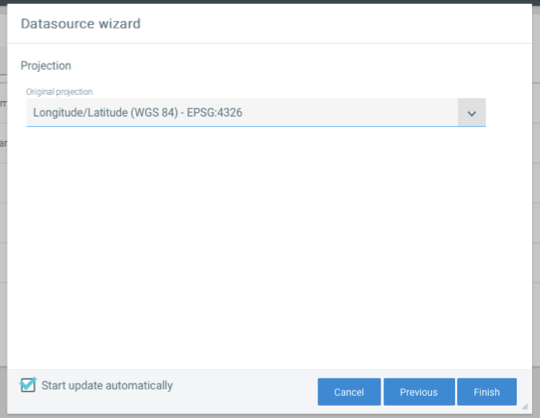
4.Afterwards, select the Longitude/Latitude (WGS 84) projection to indicate to JMap that GPS data is used. In some specific cases, the projection may be different.
5.Click on Finish.
Creating layers for Tracking in a project
To view the mobile units managed by Tracking in a project, you must create at least 2 layers for Tracking: the mobile units layer and the history layer.
Each pair of layers will be used to manage a set of mobile units (e.g. police vehicles). You must decide how the mobile units will be organized and how many layers you want to create.
Follow these steps:
1.Create a layer (named Vehicles, for instance) of mobile units whose spatial data source is the Tracking data source created above.
2.At the bound attributes stage, you must, at a minimum, select the following attributes: MOBILE_ID, DIRECTION, TIME, and MOBILE_NAME.
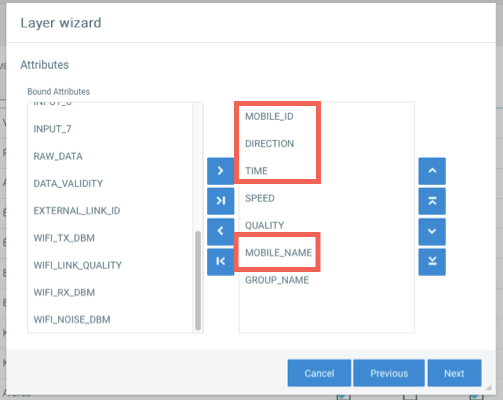
These attributes are required in order for Tracking to function. You can also select any other attribute you want to use in JMap.
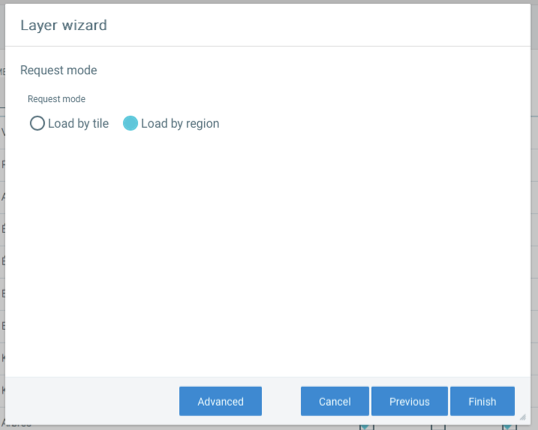
3.At the request mode step, you must select Load by region.
4.In the Advanced section, disable the Reduce precision option.
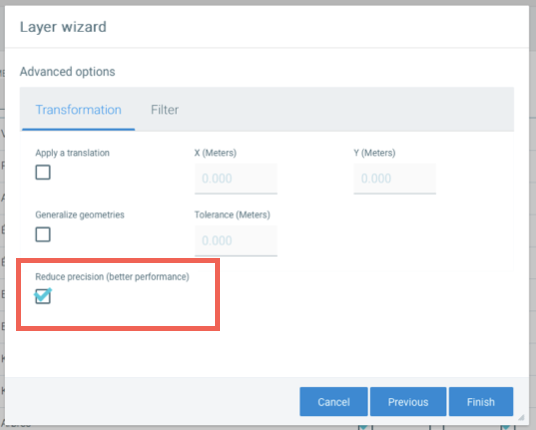
5.Also, in the Advanced section, you can filter with SQL conditions to specify the content of the Tracking layer. This would allow you to have several Tracking layers with various mobile units. To do this, you can use the groups assigned to the mobile units, which are defined in the configuration of the mobile units. Refer to Managing Mobile Units and Groups for more information. This step is optional and you can easily come back to it later.
6.Click on Finish.
Important You must also create a second layer (named Vehicles - History, for instance), which will be identical to the previous one, but it will be used to display the history (previous positions) of the layer's mobile units. Repeat the 6 previous steps for the history layer. |