Editing Layers Geometries
Table of contents
- Edition tools
- Selecting elements
- Node operations
- Vertical position and element duplication
- WKT Geometries
Layers geometries can be edited using editing tools and specific functions related to WKT format features. The user must have permissions to edit the layer data.
Editing tools are accessed from the dockable Edition window and include tools for drawing cartographic elements (points, lines, polygons, texts, etc.), a selection tool and tools for adding, moving and erasing nodes.
WKT functions are accessed from both the Tools menu and the context menu.
Edition tools
Drawing tools
Drawing tools are used to draw map elements on a layer. Only the layer that is selected to be edited can receive the elements that are drawn.
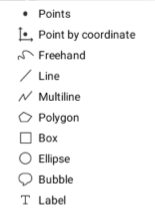
| Icons | |
|---|---|
 | Point Add a new point by clicking on the map. |
 | Point by coordinates Add a point using specific X and Y coordinates. |
 | Freehand Allows you to draw freely on the map, as if using a pencil. 1. Click and hold the left mouse button to draw. 2. Release the button when you are finished. |
 | Line Add a simple line by clicking on the map to define the first point and clicking on it again to define the second point and complete the line. |
 | Multiline Add a new multiline (line with 1 or more segments). 1. Click on the map to define each of the nodes that will form the ends of the segments. 2. Double-click or press the space bar to complete the drawing. |
 | Polygon Add a new polygon on the map. 1. Click on the map to define each of the nodes that will form the ends of the segments. 2. Double-click or press the space bar to complete the drawing. |
 | Box Add a new rectangle on the map. 1. Click to define the first point. 2. Click again on the desired location to define the second point and complete the box. |
 | Ellipse Add a circle on the map. 1. Click to define its central point. 2. Click again to complete a circle of the desired dimension. NOTE: The circle can be changed to an ellipse with radii of various lengths. |
 | Bubble Add a bubble with text on the map. 1. Click to determine the position that will be pointed by the stem of the bubble. A window appears, allowing you to enter the text that will be inserted in the bubble (one or more lines). |
 | Label Add text directly on the map. 1. Click to define the insertion point of the text (upper left corner of the text). A window appears, allowing you to enter text (one or more lines) to be added on the map. |
Note that snap functions are available with edition tools. For more details, refer to the JMap Pro User Manual.
Selecting elements
 Edition selection tool
The Edition extension’s selection tool is used to select map elements in order to perform edition operations (geometric operations, duplication, etc.) or to move elements.
Although JMap’s other selection tools can also be used in most cases, only the Edition selection tool allows you to move editable elements that are selected. Editable elements that are selected have black grab points on the nodes.
To move an element, select it, then drag and drop it to the desired location.
Node operations
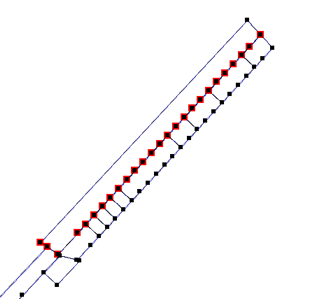
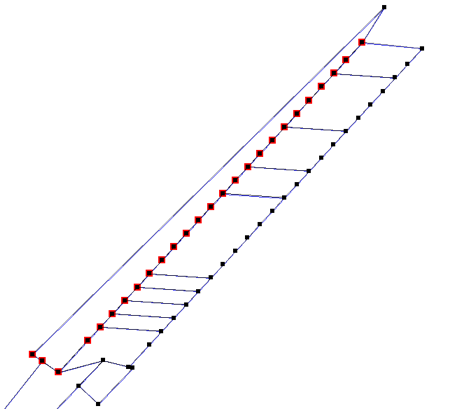
Node operations allow you to add, move, and delete the nodes of editable elements.
 Move nodes
Allows you to move one or more nodes of the selected editable elements. Note that this tool also allows you to select elements. To move a node :
-
Position the mouse cursor close to it and it will be highlighted.
-
Drag and drop the node to the desired position.
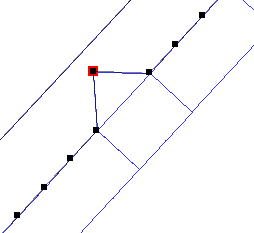
To move several nodes simultaneously while maintaining the topology:
-
Select the desired element(s).
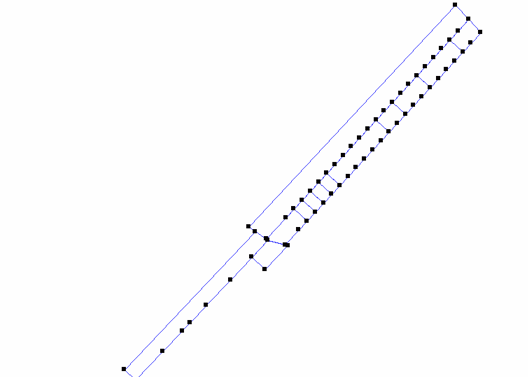
-
Press and hold the SHIFT key and select the nodes that must be moved by clicking or drawing a box. The selected nodes will be highlighted.
-
Drag and drop the selected nodes to the desired position. All selected nodes are moved simultaneously.
 Add node
Allows you to add a new node to a selected editable element. Note that this tool also allows you to select elements.
-
Position the mouse pointer on one side of the element and a yellow dot will appear to show the position of the new node.
-
Click to confirm.
 Delete node
Allows you to delete an existing node from the selected editable object. Note that this tool also allows you to select elements.
-
Bring the mouse pointer near the node to be deleted and it will be highlighted.
-
Click to confirm.
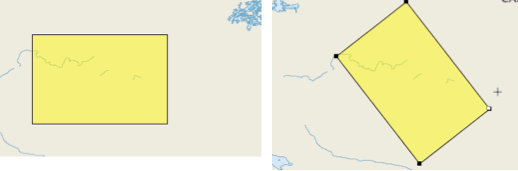
 Rotate
Allows you to rotate polygon and line elements around their center.
-
Select one of the element’s points.
-
Rotate it.
-
Release the point when you reach the desired position.
Vertical position and element duplication
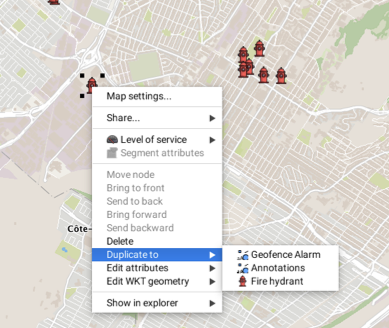
The map’s pop-up menu offers options that are specific to the Edition extension when it is included in the application. Right-clicking opens this context menu.
The vertical position of the elements on the Annotations layer can be modified. This allows you to control which element must be displayed above the others, for instance. Elements can be moved one position at a time or can all be sent to the front or back. Elements must first be selected.
Elements found on a given layer can be duplicated towards another layer. The menu displays a list of available destination layers. You must select the destination layer of your choice. When elements are copied from one layer to another, the style of the destination layer is applied to these elements. If the attributes are the same for both layers, the attribute values will be copied with the element.
WKT Geometries
The JMap Pro user can add and edit WKT geometries. The Well-known text is a format defined by OGC to represent geometric features such as points, lines, polygons, TINs, and polyhedra using two- or three-dimensional coordinates. The format is also used to represent information about features such as the coordinate system (fr.wikipedia.org/wiki/Well-known_text, www.opengeospatial.org/standards/sfa).
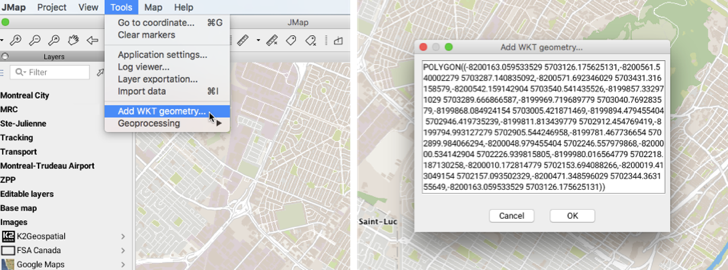
Add a WKT geometry
The function is available through Tools -> Add WKT Geometry in the menu bar. A window deploys and allows to write the coordinates of the elements to be added.
Elements are added to the Annotations layer. They can be saved in a context or they can be selected and duplicated in other editable layers, using the context menu. This menu also allows you to delete elements or change their vertical position.
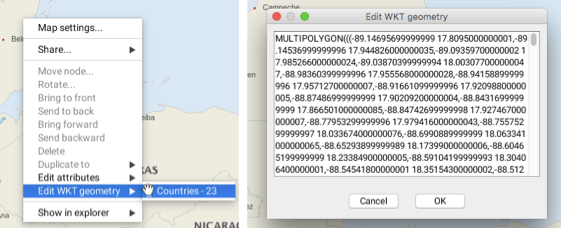
Edit WKT elements
The context menu also offers the possibility of editing WKT elements. The Edit WKT geometry function displays the elements of the layers found at the map point where the context menu is open. Select one of the elements to open the window containing the element’s coordinates and data. If you have the appropriate permissions, you can edit this data.