Editing Data
Table of contents
- Modifying the position of an element
- Removing elements
- Creating an element
- Modifying the value of an element’s attributes
- Modifying the value of attributes in a set of elements
Some of the application’s layers are editable, which means users who have the right permissions can create new point, line or polygon elements on the layer, remove existing elements, and modify the location and attributes of existing elements.
Depending on the configuration made by the JMap administrator, you may only be able to edit the items you have created. In this case, a message displayed during editing will inform you that it cannot be done.
To edit the elements of a layer:
-
Click on
 Sidebar and then click on the Layers tab to display the list of layers for the application. The
  icon indicates that the layer is editable.
 -
Click on the pencil
icon of the layer you wish to edit. The icon turns blue  , indicating that the editing functions are enabled. The editing tools are displayed in the toolbar.
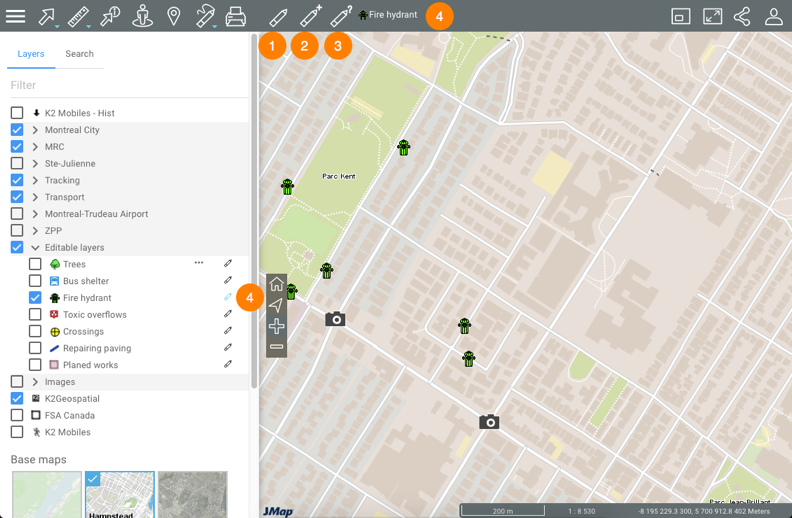
1 This tool is used to modify the position of an element or to remove it in the editable layer. 2 This tool is used to create a new element in the editable layer. 3 This tool is used to open a form, which allows you to modify the value of an element’s attributes. 4 The icon is used to identify the editable layer with its style in the toolbar and layer hierarchy. -
Click on the
icon of the layer to stop editing it. The icon will turn grey , indicating that editing functions are disabled.
Modifying the position of an element
-
Click on
 Edit Elements to enable the tool. The icon turns blue
  .
. -
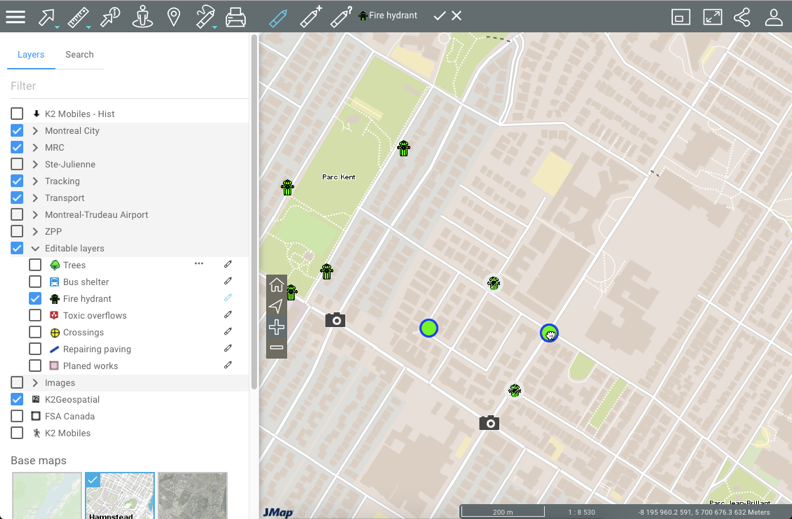
Click on the element whose position you wish to change. A mark appears on the element, indicating it has been selected to be edited.
-
When the hand
 is displayed, drag and drop the element to the desired position.
 -
Repeat steps 2 and 3 to move other elements. The number of edited elements is displayed next to the layer name in the toolbar.
-
Select
 to save your changes or
  to discard them. You can also wait until you are finished making all your changes to save or discard all of them at once.
 -
Click on
to disable the tool. The icon turns grey .
Removing elements
-
Click on
Edit Elements to enable the tool. The icon turns blue . -
Click on the element you wish to remove. A mark appears on the element, indicating it has been selected to be edited. You can click on other elements to select them and delete the whole set.
-
Press Delete on your computer keyboard. If you are working with a tablet that displays the sidebar, a Delete Elements
 legend appears to allow you delete the elements. If you are working with a smaller tablet, you do not have access to this function.
 -
Select
to save your changes or to discard them. You can also wait until you are finished making all your changes to save or discard all of them at once. -
Click on
to disable the tool. The icon turns grey .
Creating an element
-
Click on
 Create Elements to enable the tool. The icon turns blue
  .
. -
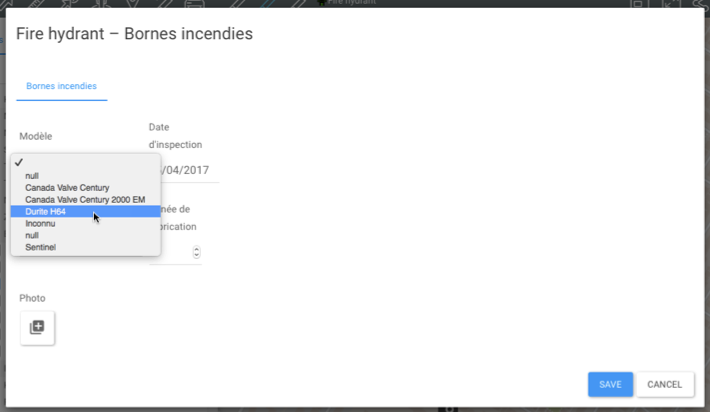
Click on the location where you wish to create the element. A form displays, allowing you to define attribute values.
-
Enter the attribute values in the appropriate fields.
-
Click on the plus sign
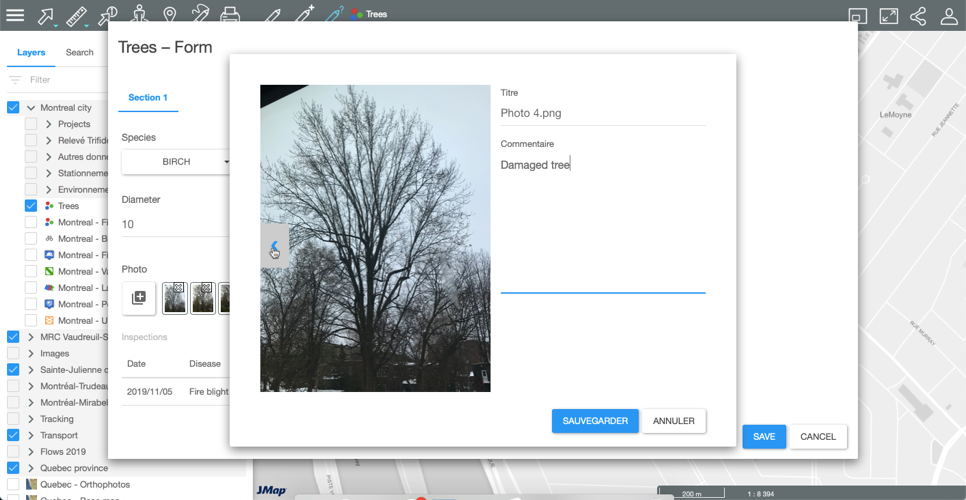
 of the Photo attribute if you wish to upload photos from your computer’s file system.
 -
Click on the thumbnail of the photo to open its interface, give the photo a Title (by default, the title is the file name), and add a Comment (up to 255 characters).
-
Click on Save to save your changes and go back to the form.
-
Click on
 to delete the photo, if needed.
 -
Click on Save to create the new element. The element displays in the map.
-
Repeat steps 2, 3 and 4 to create other elements. The number of edited elements is displayed next to the layer name in the toolbar.
-
Select
to save the changes or to delete them. You can also wait until you are finished making all your changes to save or discard all of them at once. -
Click on
to disable the tool. The icon turns grey .
Modifying the value of an element’s attributes
-
Click on
 Form to enable the tool. The icon turns blue
  .
. -
Click on the element whose data you wish to modify. A form displays, allowing you to define attribute values.
-
Configure the attribute values in the appropriate fields.
-
If you want to edit the title and comments of the photos in the form, click on the photo of your choice to open the editing interface. You can use the blue arrows to browse through the photos.
-
Change the title or comment of the photo.
-
Click OK to close the editing interface.
-
Click on Save to save the changes.
-
Repeat steps 2, to 7 to modify the attribute values of other elements. The number of edited elements is displayed next to the layer name in the toolbar.
-
Select
to save the changes or to delete them. You can also wait until you are finished making all your changes to save or discard all of them at once. -
Click on
to disable the tool. The icon turns grey .
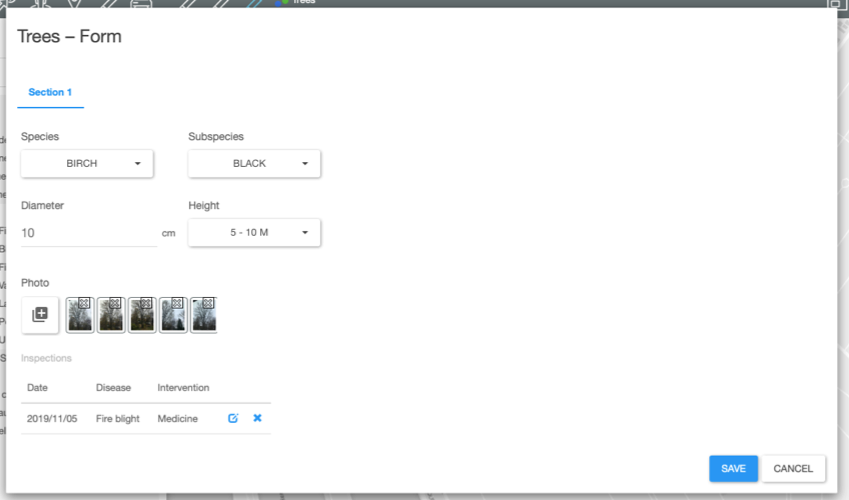
Certain forms are complex and comprised of several sections:

| 1 | The main section of the form. This section may contain attributes that you cannot modify. |
| 2 | Subform. There may be several subforms within one form. |
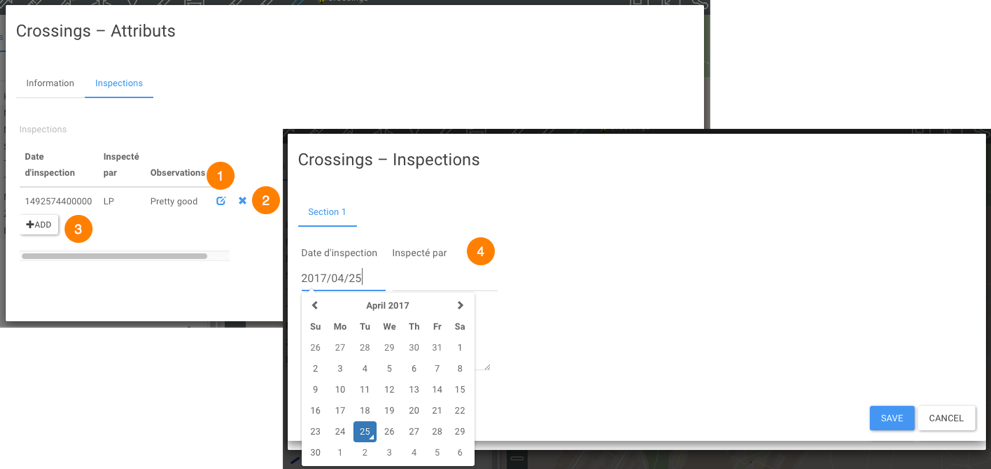
| 1 | You can edit a log entry in a subform. |
| 2 | You can delete a log entry from a subform. |
| 3 | You can add a log entry to a subform. |
| 4 | A page of the subform allows you to add or modify the attributes of a subform’s log entry. |
Editing, deleting or adding functions are enabled only if the form configuration allows editing, deleting or adding records. If the functions are disabled, the icons are gray rather than blue.
Modifying the value of attributes in a set of elements
You can modify the attribute values of a set of elements you have selected.
-
Select the elements you want to edit, using a search or interactive selection tools.
-
Make the layer editable by clicking on the
icon. The editing tools are displayed in the toolbar. -
Click on the Form icon
to activate the tool. The icon turns blue. A window opens to validate your intention to edit the selected set of elements. -
Click OK to validate your choice and open the attribute editing form.
-
Select the new values of the attributes. These values apply to the set of elements. Some attributes whose values do not display in drop-down lists offer advanced editing features.
-
Click on the
 icon to open the options for advanced attribute editing. A list displays the current values of the attribute.
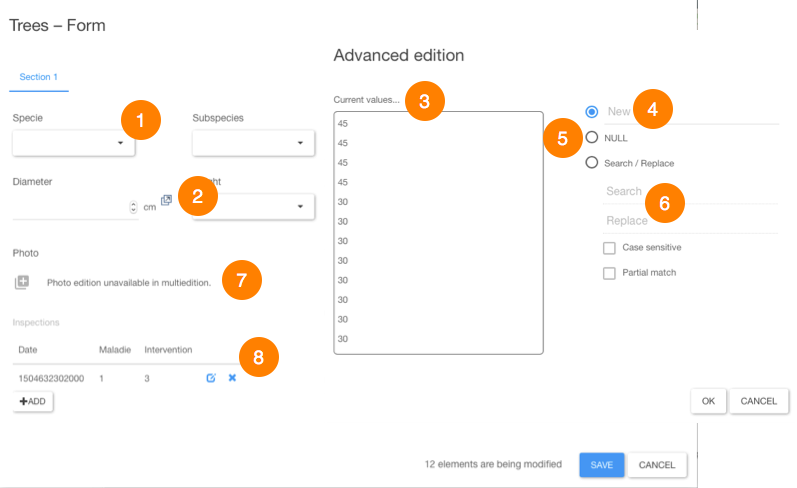
1 Attributes whose values are displayed as drop-down lists can be edited directly by selecting the new values. 2 Attributes whose values are entered directly provide advanced editing capabilities. 3 The current attribute values in the selected elements are listed. 4 A range allows you to enter a new value. 5 The Null value can be assigned to the attribute. 6 This function allows you to search for and replace values. The search can be case sensitive, and partial matches are supported. 7 Editing photos is not available in multi-editing mode. 8 Editing subforms is available. Click to open the subform. -
Save the form.
-
Check
to save changes or to delete them. -
Click on
to disable the tool. The icon turns grey .