Welcome to JMap NG
Table of contents
- Connecting to JMap NG
- The graphical interface
- Profile and user settings
- Navigating on the map
- Displaying tooltips
JMap NG is an online mapping application that belongs to the JMap family of applications (JMap Pro, JMap Web, JMap Survey, and JMap NG).
Along with JMap Survey, JMap NG is part of the new generation of JMap applications. Unlike traditional applications (such as JMap Pro and JMap Web), which must be deployed, new generation applications connect directly to the JMap Web API, allowing users to access an entire project.
JMap NG provide users with an interactive tool, which allows them to navigate the map as well as query and edit spatial and descriptive data.
The graphical interface adapts to the screens of smart phones, computers and tablets, providing access to features that are relevant to each device.
Connecting to JMap NG
JMap NG is accessed via a Web browser (Edge, Google Chrome, Firefox, Safari, etc.) using a URL provided by your JMap administrator.
The following image shows JMap NG’s login interface.
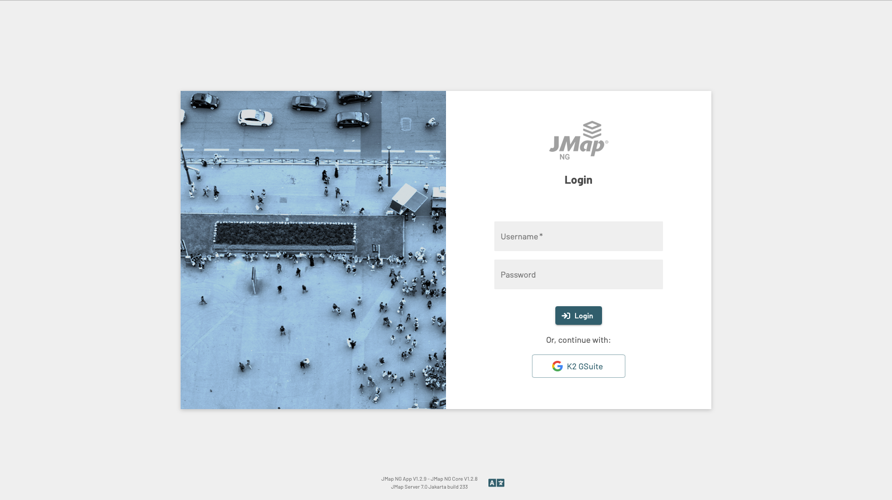
The login interface and the application itself will be displayed in the language you configured for your web browser.
- Click on the
 icon located at the bottom of the interface to display the available languages and change the display language of JMap NG.
If access to the application is controlled, you must obtain a username and password from your organization to log into it. If your organization uses single sign-on tools, you can use them to log in.
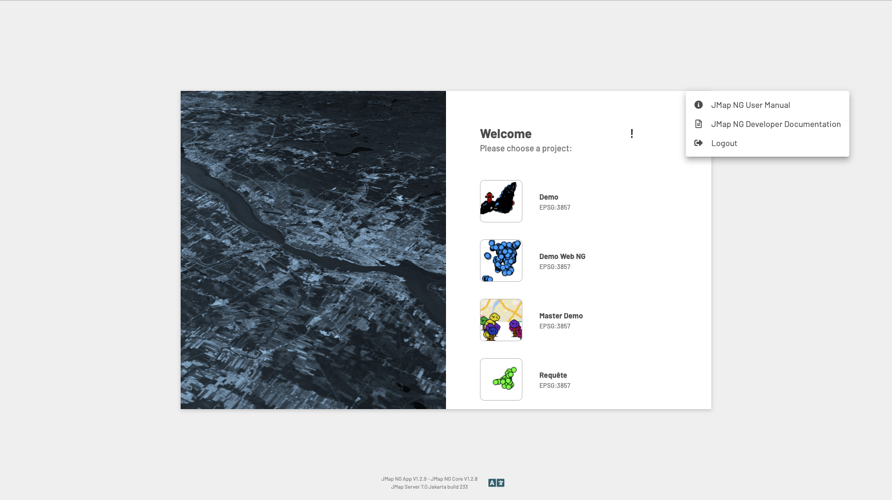
Once you are logged into the application, the following interface allows you to select the project you wish to access. The projects you have permission to access will be displayed.
-
Click on a project to access it.
-
Click on
 to open the menu providing access to the documentation and allowing you to log out of your JMap NG session.
 -
Click on
to change the language of the application.
The graphical interface
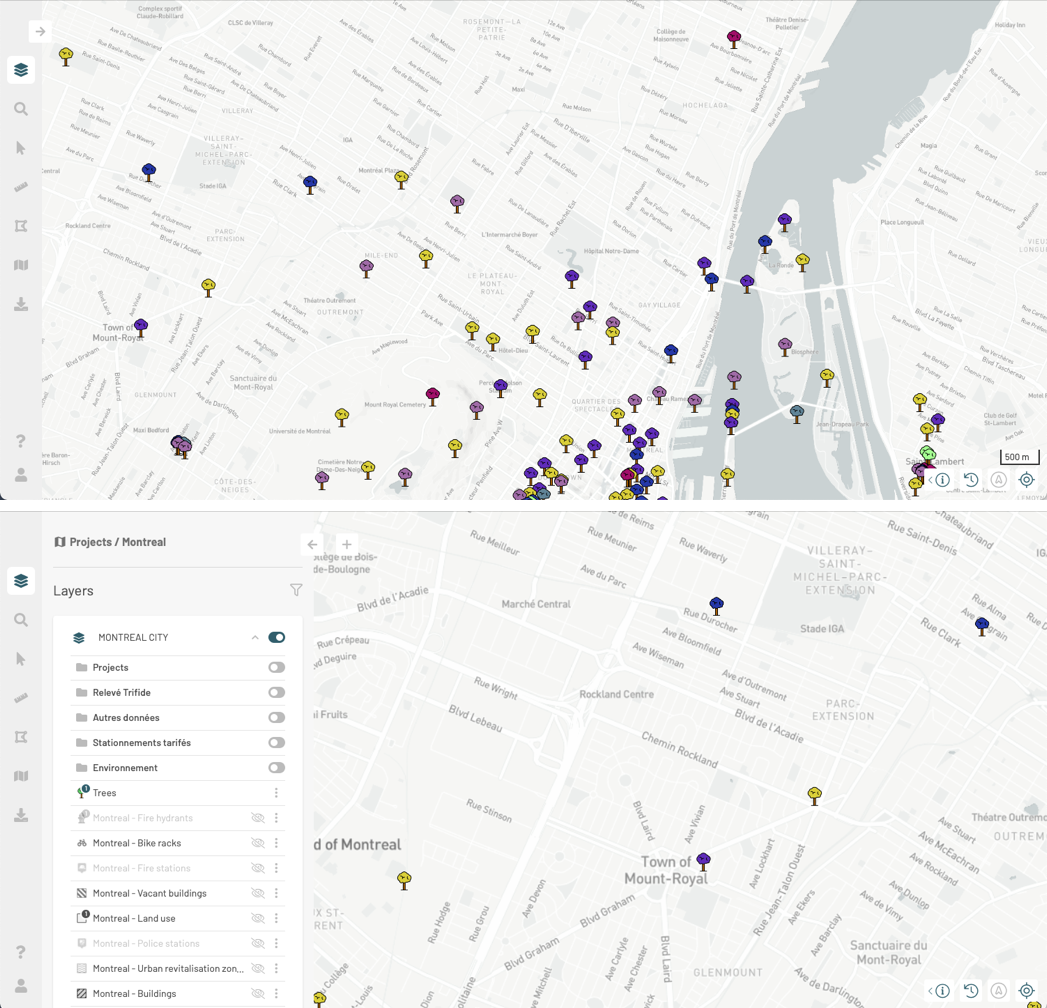
The graphical interface is comprised of the following:
-
A lateral bar with icons allowing you to access menus with the application features, which are organized into panels.
-
Geographic positioning and map scale tools.
-
The map itself, which displays the application data.
| Icons | |
|---|---|
| Arrow to open a panel. Each panel displays the name of the project that is open in the application. 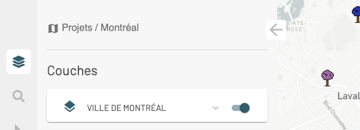 To switch projects, click on Projects. The projects interface appears. You can select a new project by clicking on it.  | |
| This arrow closes the panel. | |
 | Button to add a cartographic element to an editable layer. For details on these features, refer to Editing data. |
 | Click on this icon to display the Layers panel. For details on the features of this panel, refer to The Data. |
 | Click on this icon to display the Search on map panel. For details on the features of this panel, refer to Performing Searches. |
 | Click on this icon to display the Selection panel. For details on the features of this panel, refer to Selecting Elements in the Map. |
 | Click on this icon to display the Measures panel. For details on the features of this panel, refer to Measuring Distances and Surfaces. |
 | Click on this icon to display the Annotations panel. For details on the features of this panel, refer to Adding Annotations to the Map. |
 | Click on this icon to display the My maps panel. For details on the features of this panel, refer to Creating and Managing Customized Maps. |
 | Click on this icon to display the Export the map panel. For details on the features of this panel, refer to Exporting a Map. |
 | Click on this icon to access JMap NG’s user and developer documentation. |
 | Click on this icon to display the Profile and user settings panel. For details on the features of this panel, refer to Profile and user settings. |
 | Click on this icon to show the geographic information of the map: the scale and the coordinates of the cursor in Latitude and Longitude. |
 | When clicking on this icon, the map display will return to the last position viewed. |
 | When clicking on this icon, the map will return to the default rotation. For details on this feature, refer to Navigating on the map. |
 | Click on this icon to geolocate yourself, i.e. to display the position of the device with which you are using JMap NG. A blinking dot shows your position in the map. Click on the icon again to hide your geolocation. Note: in order for the geolocation feature to work, you must allow JMap NG to know the location of your device. |
 | Bar scale. The scale indicates the actual size of the line  in the map. in the map. As you navigate and zoom in and out on the map, the distance displayed in this line will vary. The distance is displayed in the unit selected in the Profile and user settings panel. |
Each panel contains features and information. Each panel contains a breadcrumb that allows you to switch projects.
Profile and user settings
The Profile and user settings panel offers some basic functionality to customize JMap NG’s interface.
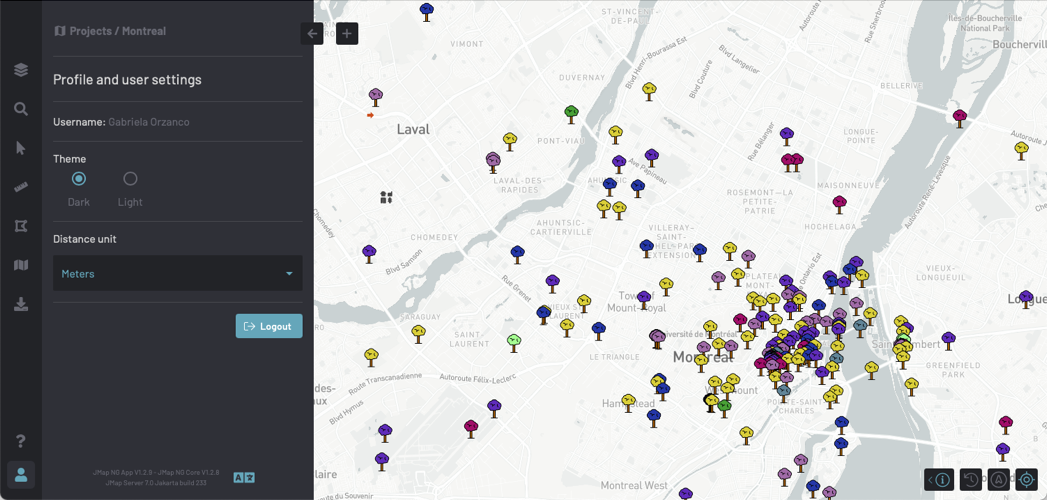
-
Click on
to open the Profile and user settings panel. -
Select the Theme of the application.
-
In the Distance unit drop-down menu, select the unit that will apply to the scale and the distance and area measurements.
-
Click on
to display the available languages and change the application’s language. The change can take a few moments because it may involve changing the language of the application and data (layer titles, attribute names, tooltip content, etc.). -
Click on Logout if you wish to log out of the session. You will return to the JMap NG login interface.
-
Click on
 to close the Profile and user settings panel.
Navigating on the map
You can navigate on the map using your fingers or the cursor:
-
Using your fingers, you can zoom in and out, move the map, and tilt it to navigate on it in 3D, as shown in the figure below.
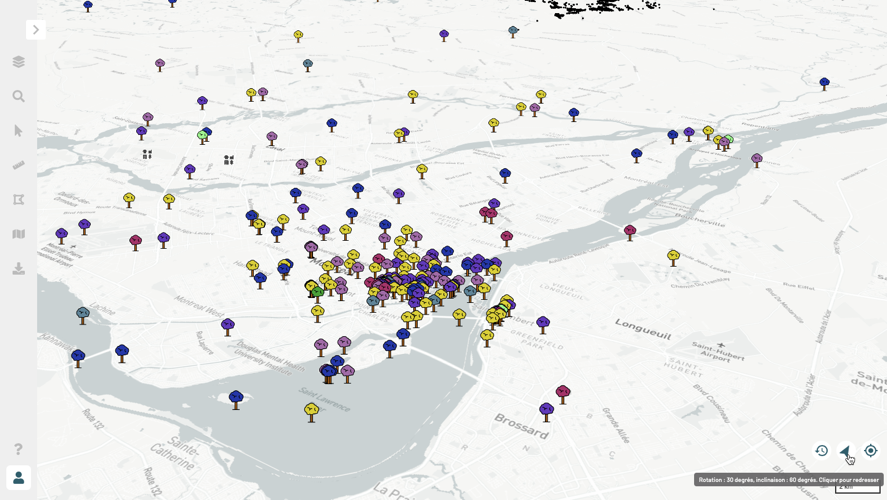
Some layers will display 3D data. You can navigate through this data in 3D.
-
Click on the
icon to display map rotation information (in degrees, with North as a reference) and map inclination information (in degrees, based on the horizontal plane). -
Click on the
icon to straighten the map, eliminating the rotation and tilting of the map. The icon turns gray and indicates the North on the horizontal plane  .
.
Displaying tooltips
Some map elements will display a tooltip when you touch them or when you click on them. The tooltip contains information on the element’s attributes, and it can include text, hyperlinks to open documents or videos in their native applications, photos, etc.
Tooltips are displayed temporarily for one element at a time.
To display a tooltip:
-
Click on an element whose tooltip you wish to display. The tooltip automatically appears.
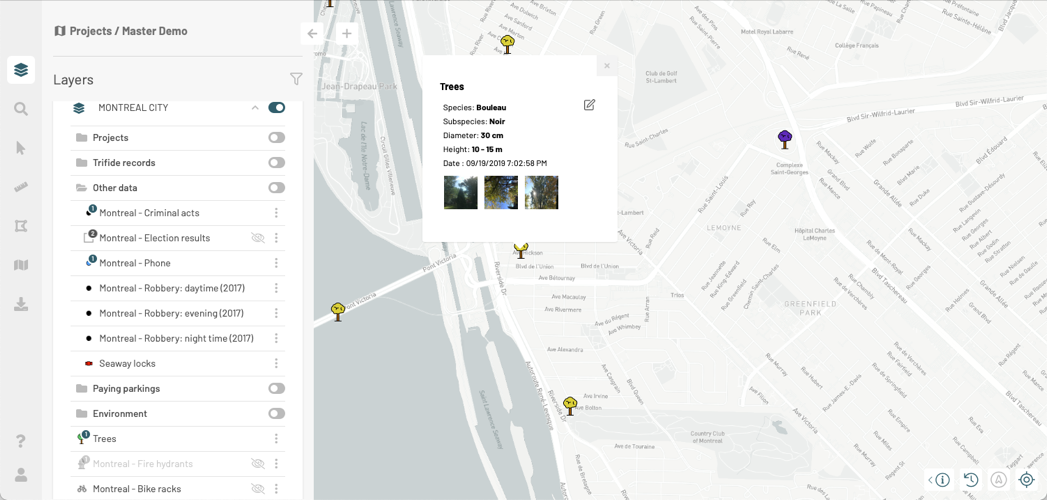
-
Click on a photo to enlarge it and to display its title and comments.
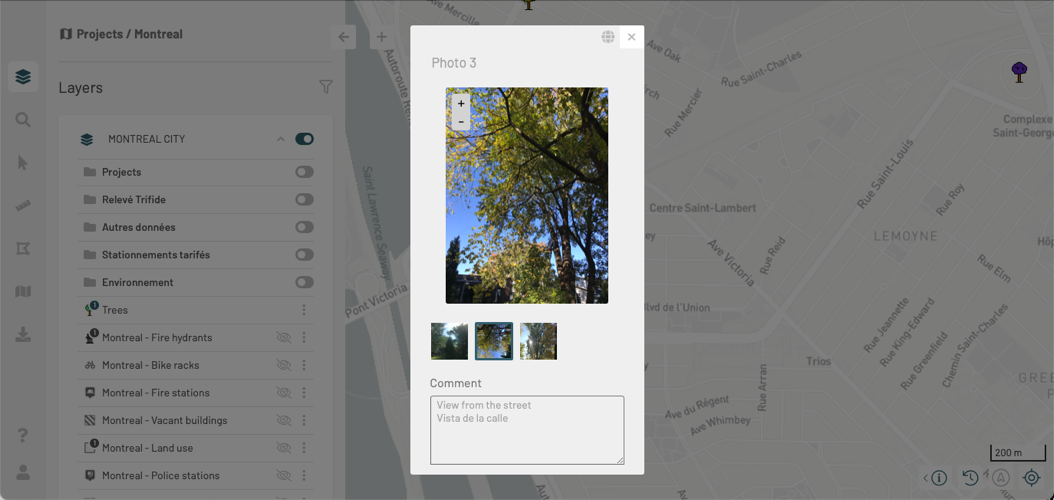
-
If the photo is a 360-degree photo, the viewer opens automatically in panoramic mode.
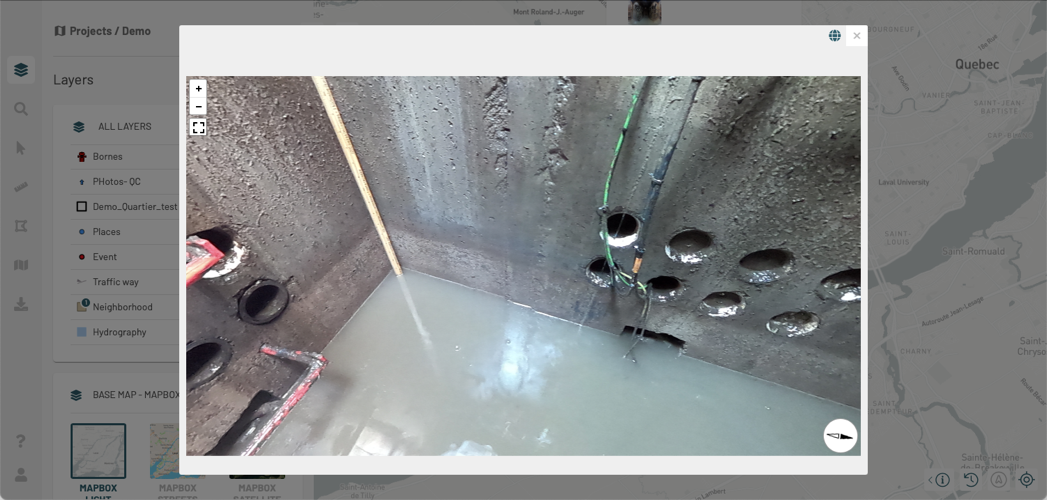
-
Use the
 and
and  buttons to navigate the photo or
  to view it in full screen.
 -
Click on
 to see the photo in standard mode.
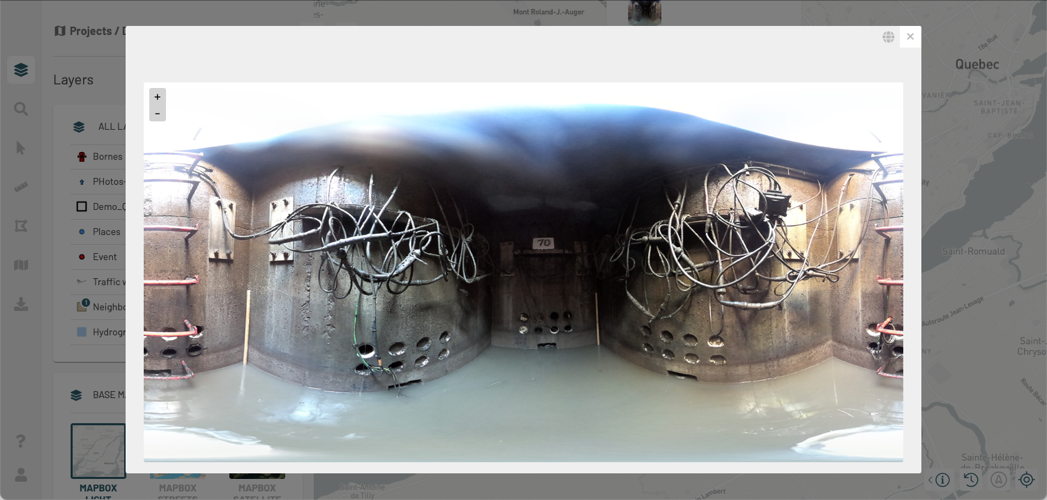
-
Click on
 to see the photo in panoramic mode.
 -
Click on
 to close the 360-degree photo viewer.
 -
Click on another photo to enlarge it.
-
In the tooltip, click on
 to modify the element. The Edit cartographic elements section contains the details of this topic.
 -
Click on
 to close the tooltip or click on another map object to open its tooltip.