Editing Data
Table of contents
You can edit data in map layers. You must have the relevant permissions for the different types of editing:
-
Create a new element
-
Modify the geometry of an element
-
Modify the values of the attributes of one or more elements
-
Delete one or more elements
Creating an element
To create a new element:
-
Click on
 in the map interface. The Select type of feature to create panel is displayed along with the
  icon in the sidebar. The panel displays all the layers for which you have the right to create an element.
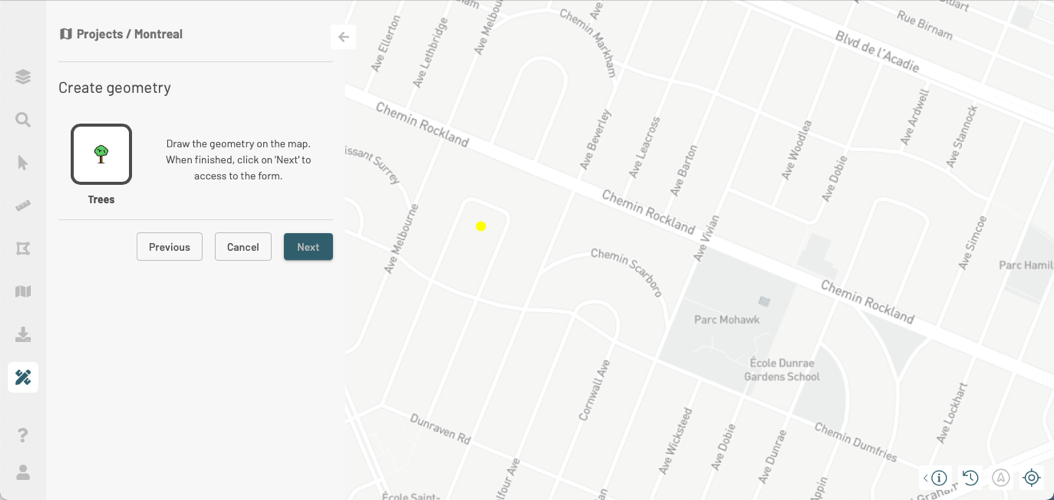
-
Click on the layer of your choice to select it and click Next. The Create geometry panel is displayed.
-
Create the geometry of the element. The following table details the procedure for creating each type of geometry.
| Point | 1. Click where you want to draw a point. 2. To modify the location of the point, click on it, the point turns yellow, and move it to the desired position. |
| Line | 1. Click where you want to draw the first point of the line. 2. Click to draw the vertices of the line. 3. Double-click to end the line. 4. To modify the line, click on a vertex, which turns yellow, and drag it to the desired location. 5. Repeat until you get the desired geometry. |
| Polygon | 1. Click where you want to draw the first vertex of the polygon. 2. Click to draw the vertices of the polygon. 3. Double click to draw the last vertex and finish the polygon. 4. To modify the polygon, click on a vertex, which turns yellow, and drag it to the desired location. 5. Repeat until you get the desired geometry. |
-
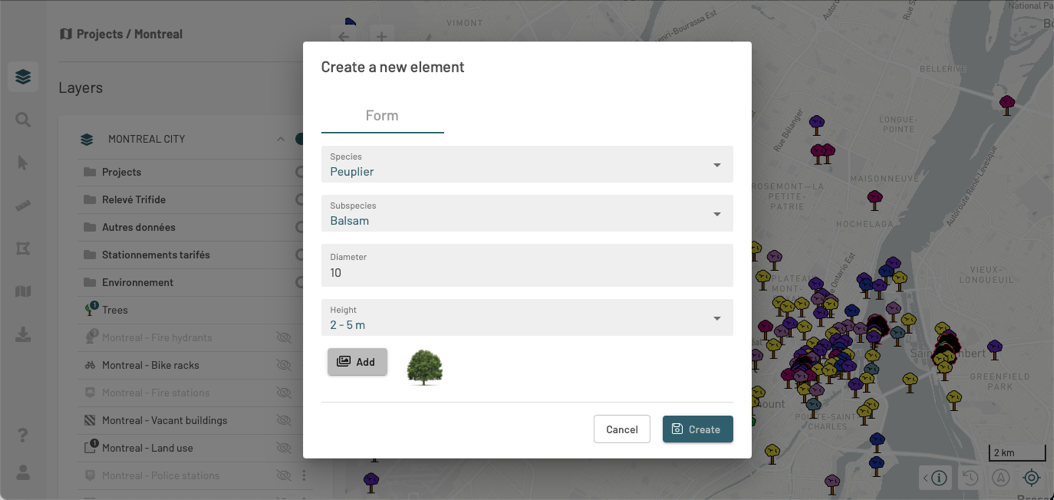
Click Next to open the form in which to enter the attributes of the element.
-
Enter the values for each of the form fields. You can upload photos, if the form allows it. To delete a photo, click on the x that appears on the photo when the pointer passes.
-
Click Create to create the item. This is displayed in the map. The Select type of feature to create panel closes automatically.
Modifying an element
You can modify an element of an editable layer, if you have the relevant permissions:
-
Click on the item you want to edit to display its tooltip. If the layer is editable and you have the necessary permissions, the
 icon will appear in the tooltip.
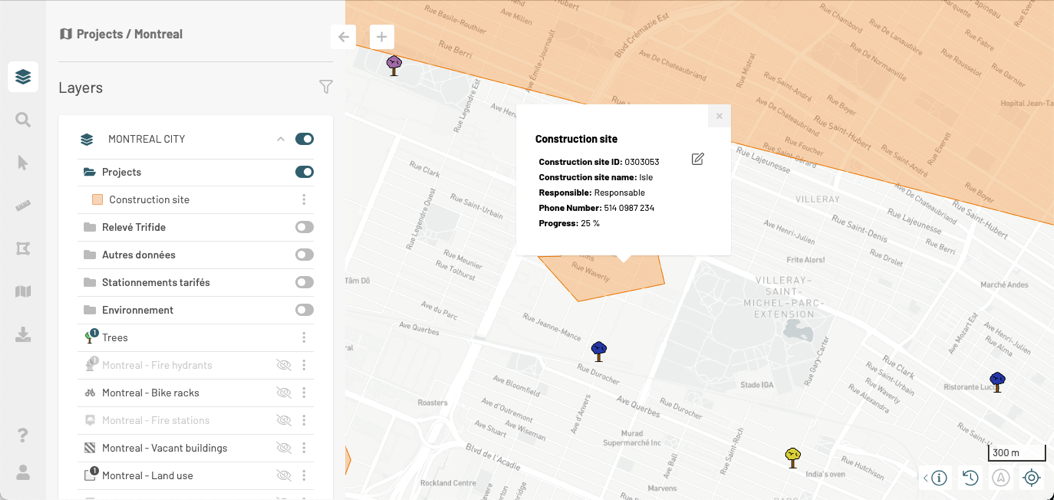
-
Click on
to edit the item. A window is displayed indicating the modifications available according to your permissions: Change geometry, Edit info or Delete. -
Select the type of editing you want to perform.
Modifying an element’s geometry
-
Click on Change Geometry to display the panel Update geometry. The geometry of the element is colored yellow.
-
Click on the element to select it. Lines and polygons display vertices.
-
If you want to change its position, drag the element and drop it to the desired location.
-
If you want to change its shape, click on a vertex to select it and drag it. New vertices are created between 2 existing vertices to allow you to modify the shape of the geometry.

-
Click on Save to save the changes.
Modifying the value of an element’s attributes
-
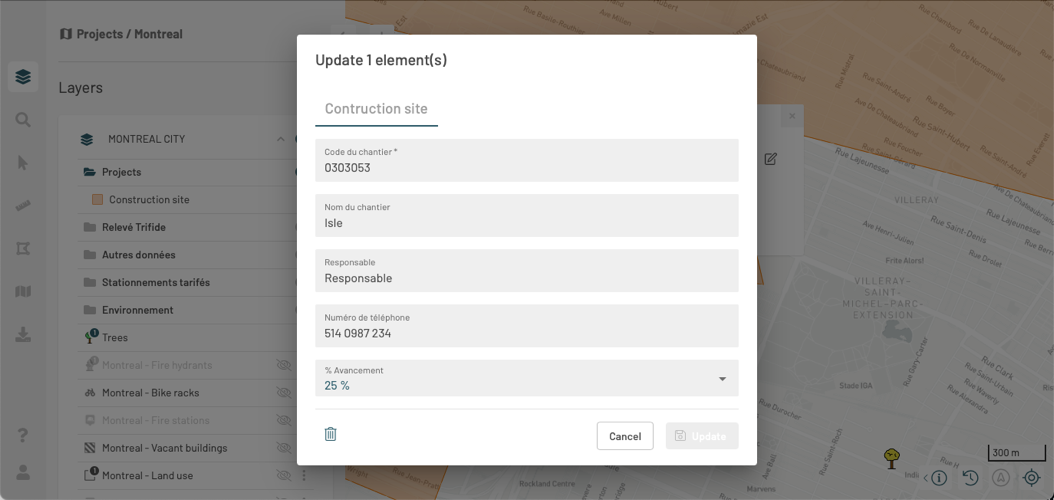
Click on Edit info to edit the attribute value of the element. The form is displayed.
-
Click on
 if you want to delete the element.
 -
Modify the value of the attributes. To delete a photo, click on the x that appears on the photo when the pointer passes.
-
Click on Update to save the changes. The form closes automatically.
Removing an element
-
Click on Delete if you want to delete the element. A validation message is displayed.
-
Click on OK. The element is removed from the layer.
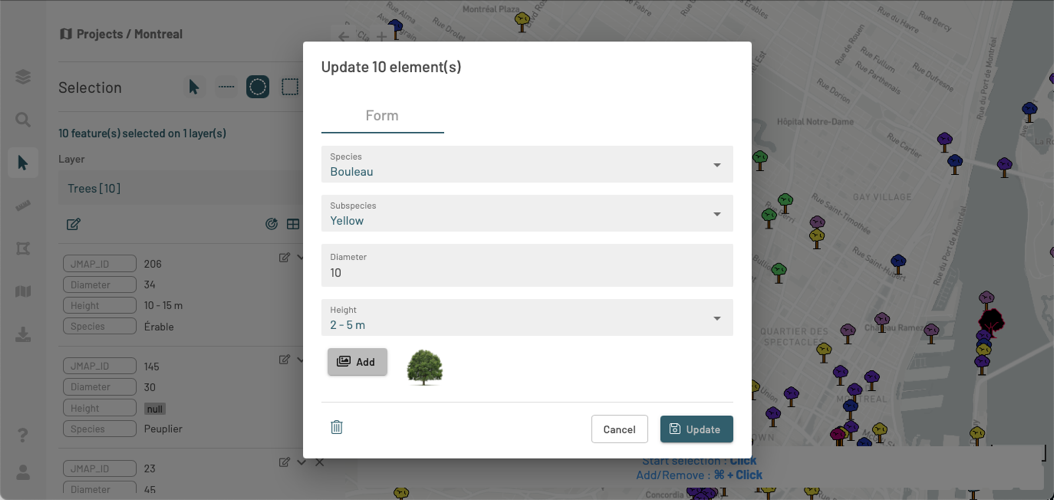
Modifying a set of elements
You can edit a set of elements you have selected through an attribute-based search or through interactive selection in the map.
When you have selected items, the Selection panel is displayed. Among the functions available for working with selected items, the  icon indicates the batch edit function of the selected items.
To batch modify the set of elements:
- Click on in the Selection panel. A window is displayed indicating the modifications available according to your permissions: Edit info or Delete. You cannot modify the geometries of a set of elements. The window also displays the number of elements selected and the layer concerned.
Modifying the value of attributes
-
Click on Edit info to modify the value of the attributes. The form is displayed.
-
Click on
if you want to delete the element. -
Modify the value of the attributes. To delete a photo, click on the x that appears on the photo when the pointer passes.
-
Click on Update to save the changes. The form closes automatically.
Removing elements
-
Click on Delete if you want to delete the set of elements. A validation message is displayed.
-
Click on OK. The elements are removed from the layer.